A Primer on Stations and Functions
As a mobile developer who also works on server backends and cloud infrastructure with AWS, I always wish for a simple, visually appealing cloud service that lets me create data pipelines quickly and easily.
Generally, I prefer keeping most business logic in a backend and keeping the mobile app as simple as possible. That way, when the business logic changes I can redeploy backend code instead of releasing a new app version, which takes more time.
I also like structuring use cases as pipelines: a defined input and output, with discrete steps that make up the business flow.
While AWS is the dominant player, I often find their web UI complicated—especially when prototyping and wanting to click around without using the AWS SDK. I want something simple and explorative. I may have found such a solution with memphis.dev, which recently released their “Functions” offering. With Memphis you create a “station” (similar to a Kafka topic ), and can define a data pipeline visually. Stations have producers and consumers.
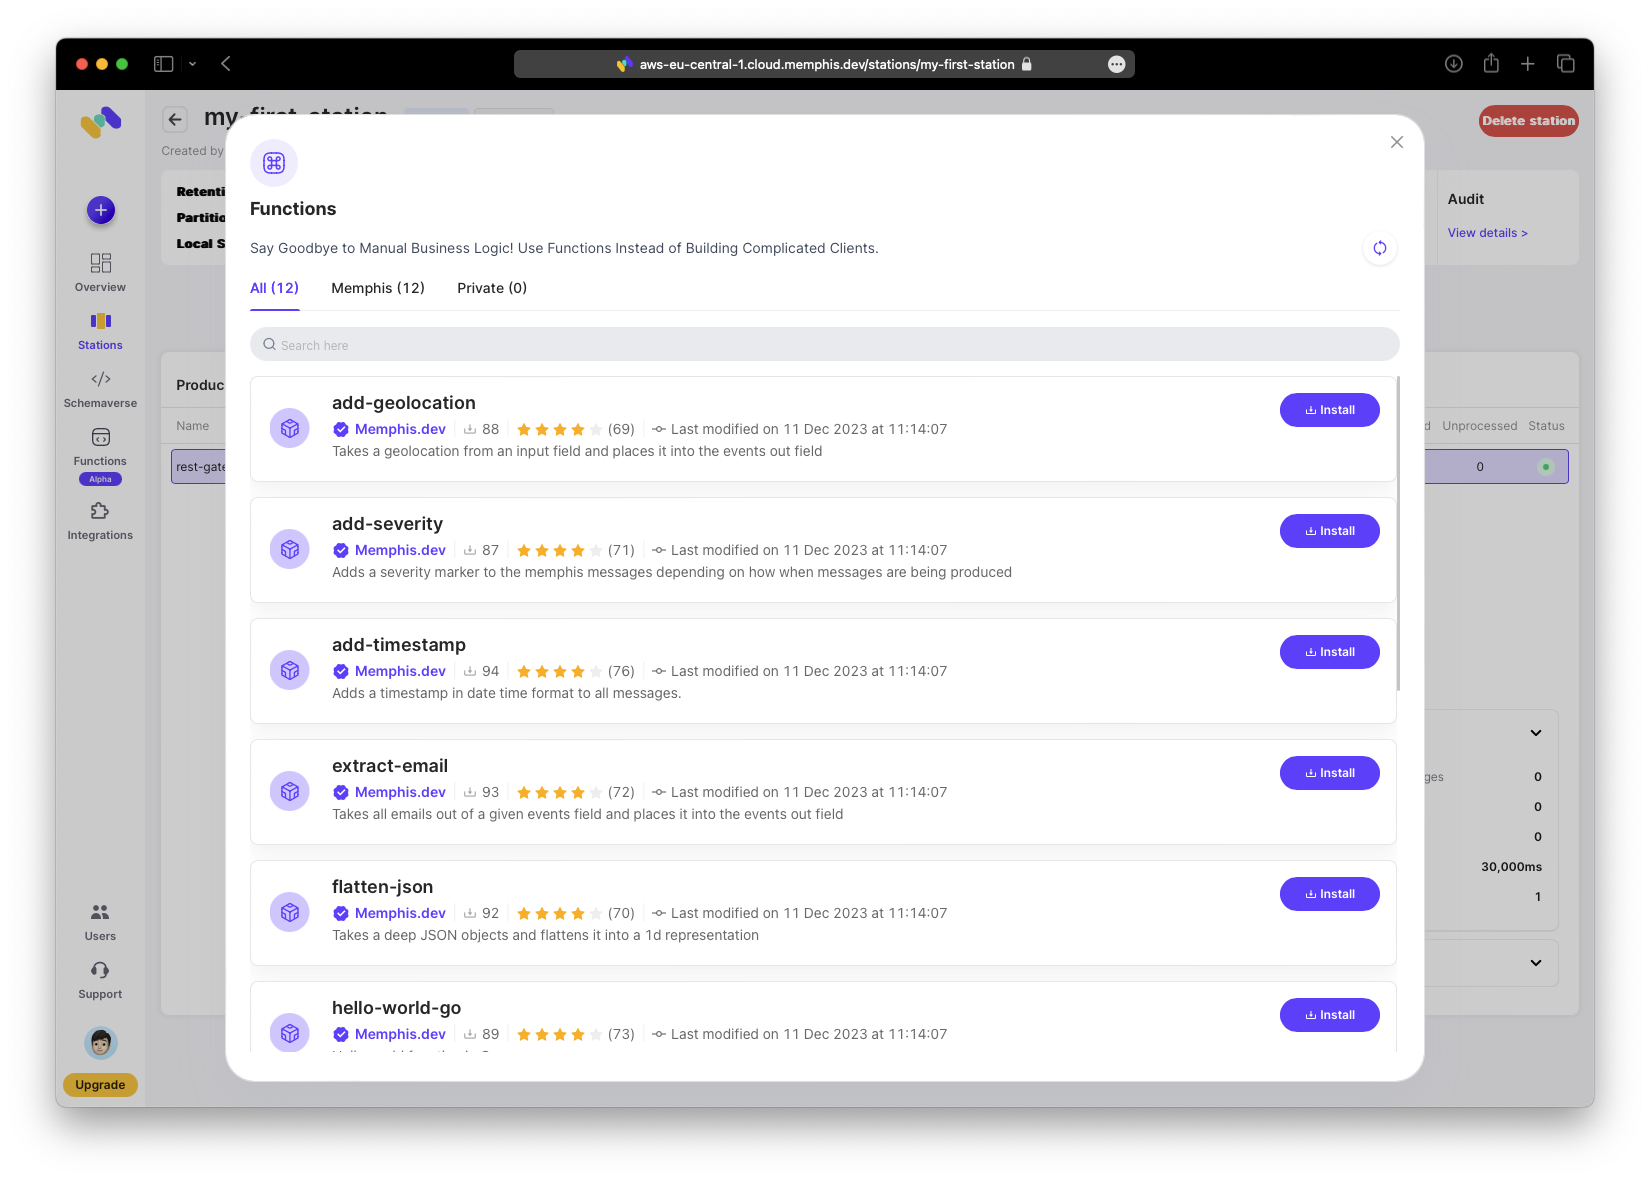
The important part for me is being able to manipulate data before consumers receive messages. Memphis provides several useful built-in functions that you can customize. Alternatively, you can define your own functions in a GitHub repository you control and link it to your Memphis account.
Imagine a fictional scenario: a person arrives at a hospital for treatment and registers. They provide personal data that will be used across the hospital.
Some data is relevant to certain departments and irrelevant to others. For example, food-preparation staff do not need patients’ social security numbers, and billing does not need dietary preferences. Beyond irrelevance, GDPR may legally prohibit some departments from processing or storing certain personal data. Therefore, scrubbing or restricting data is necessary.
We will also cover enriching incoming data with fields not provided by producers. For example, if a mobile app lacks a required feature, you can add a function to the pipeline instead of re-releasing the app.
In this post I will create a pipeline that enriches incoming data with a timestamp and removes another data field before consumption. I will:
- Create a client user
- Create a station
- Create a JSON Web Token
- Produce a message
- Consume a message
- Attach a function to add a timestamp
- Attach a function to remove a data field
This defines a simple pipeline: an input message from a producer is processed by the station and distributed to subscribed consumers.
In a second post, we will introduce private functions hosted in your GitHub repository and ensure schema consistency across services.
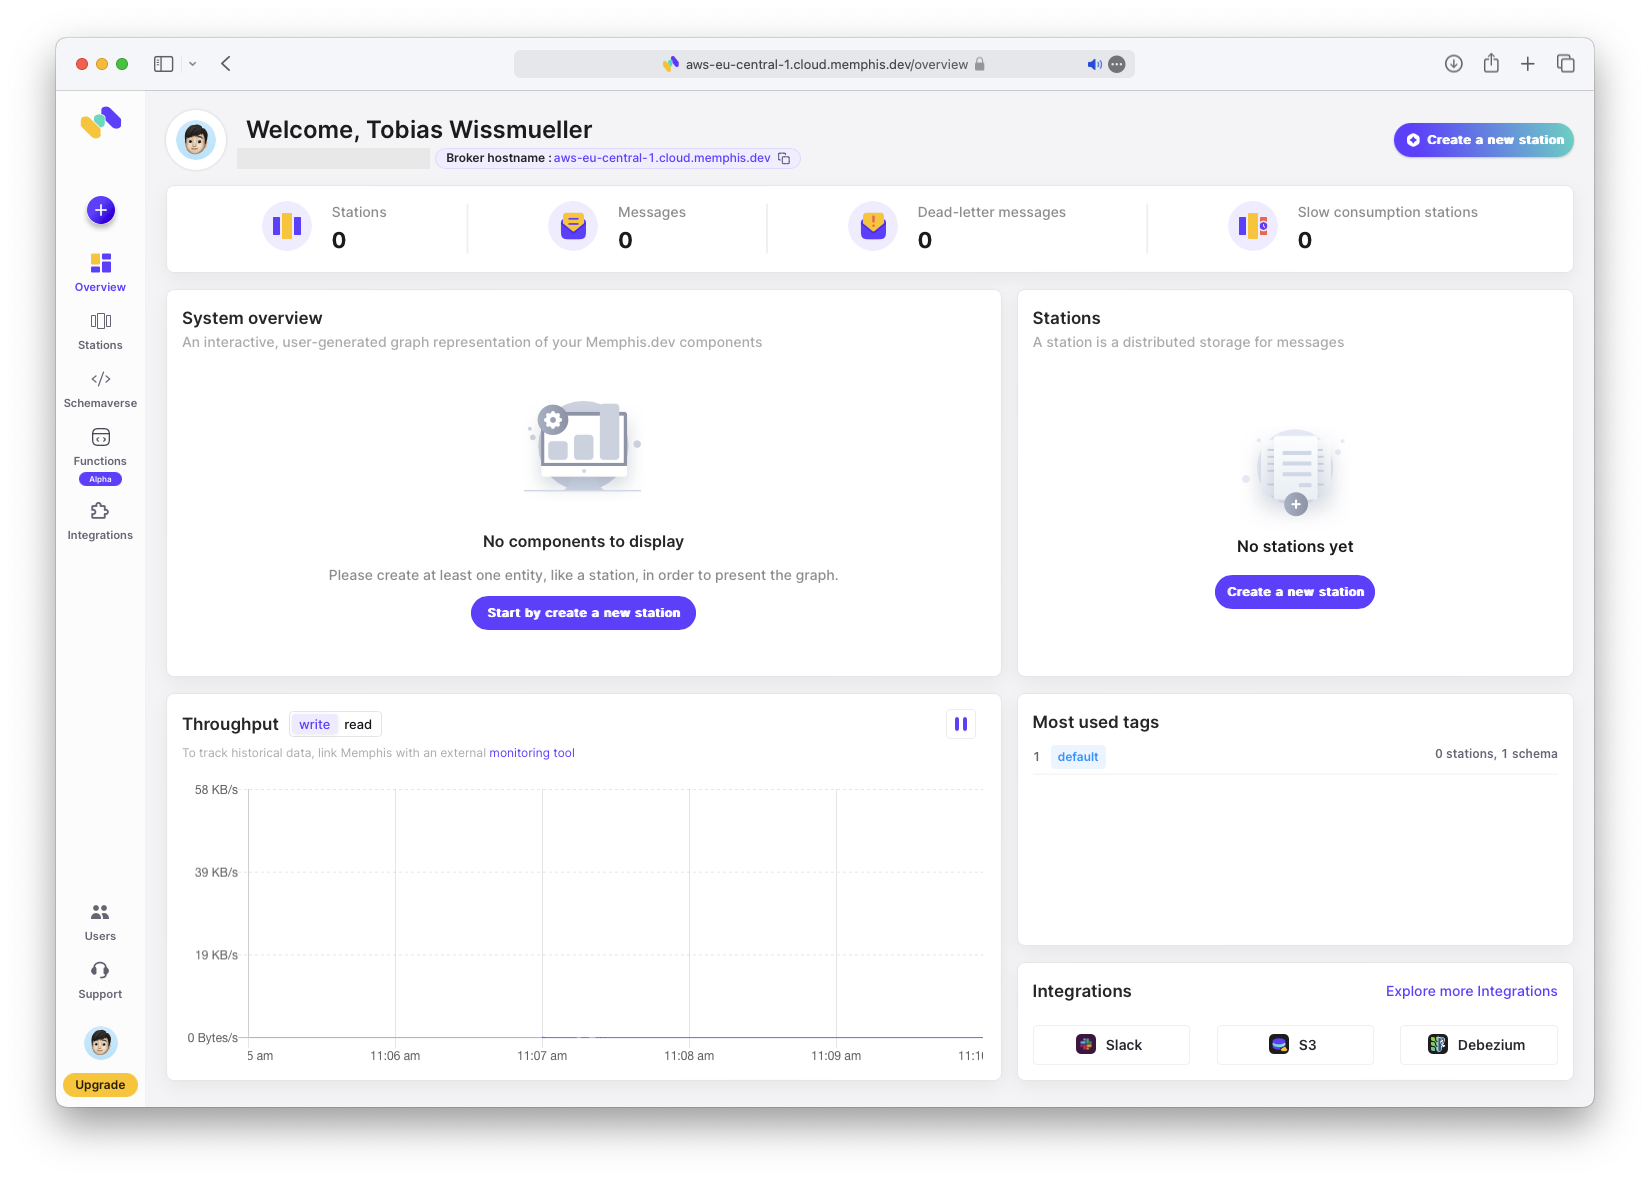
After creating an account, we begin with an empty Overview.
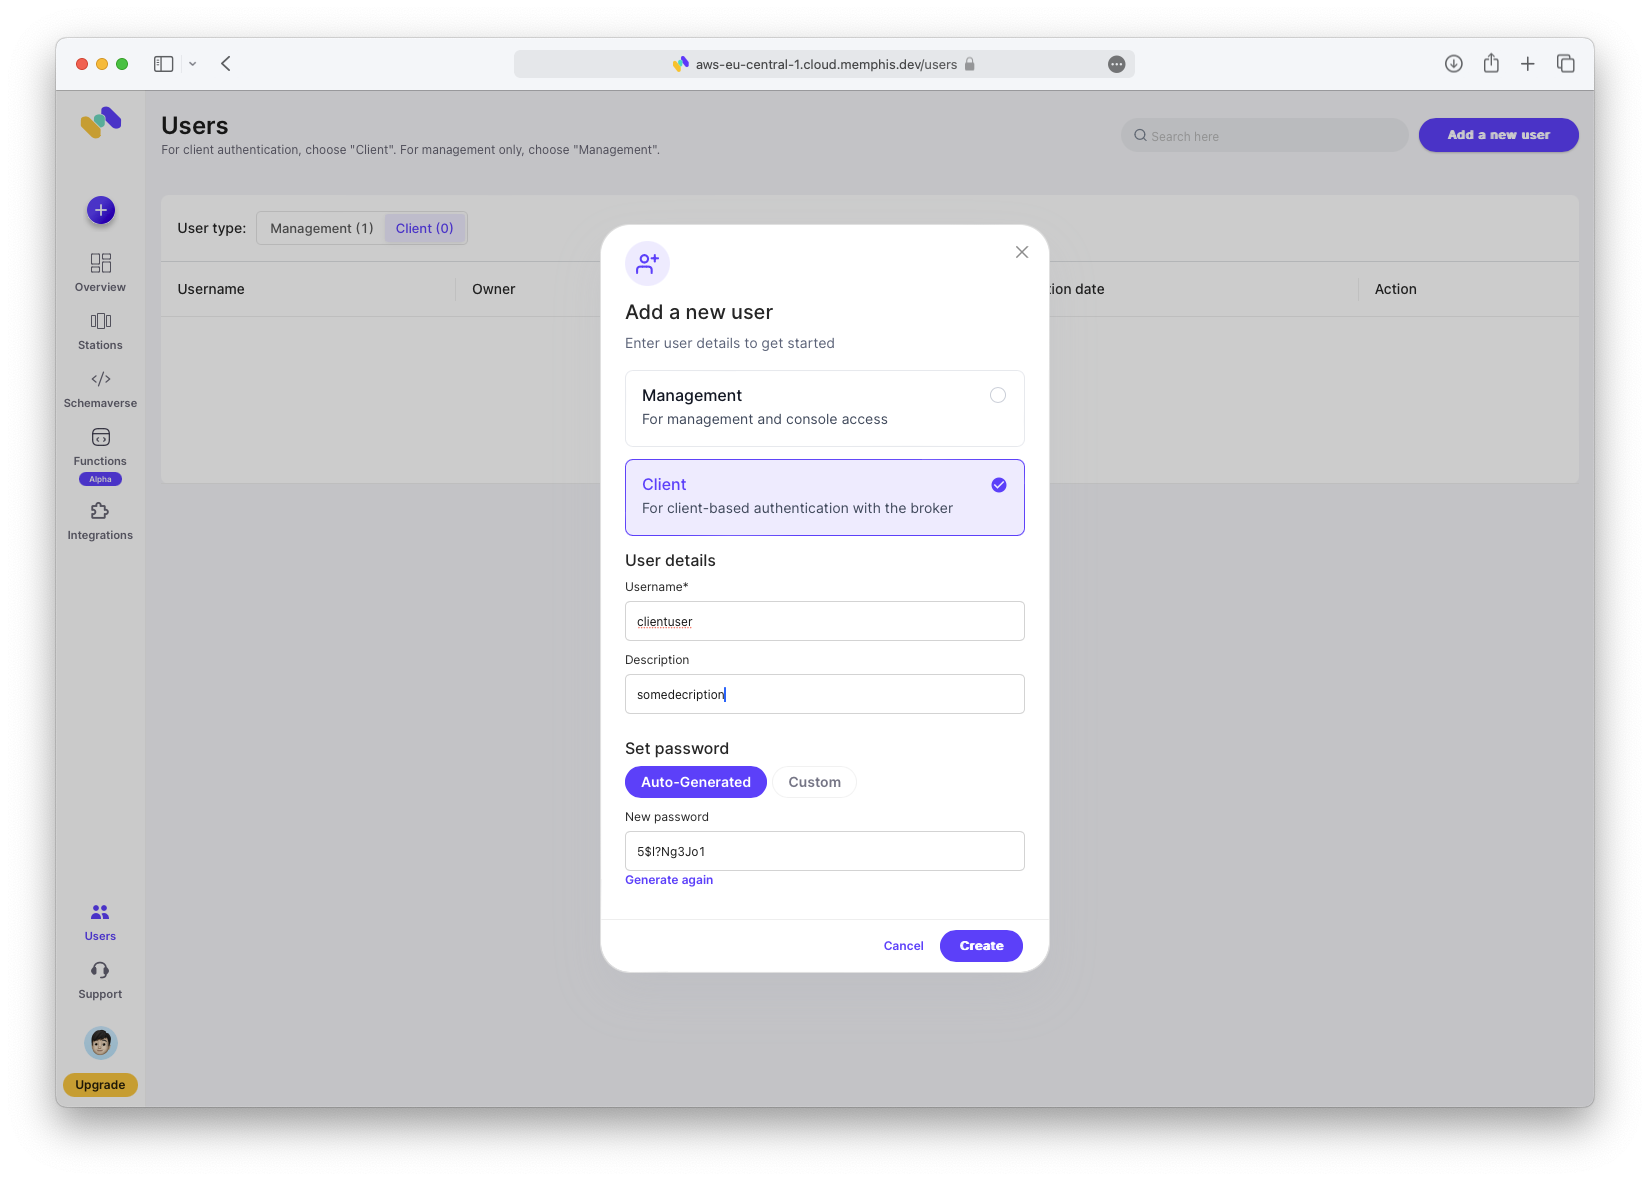
Create Client User
Create a client user: click “Users → Client → Add a new user”. Make sure to write down the password; you will need it later.
Create Station
Next, create the station. For more on stations, see the Memphis Station Documentation. If you have Kafka experience, the concept will be familiar.
Click “Stations → Create a new station”. Enter a name and leave other fields unchanged.
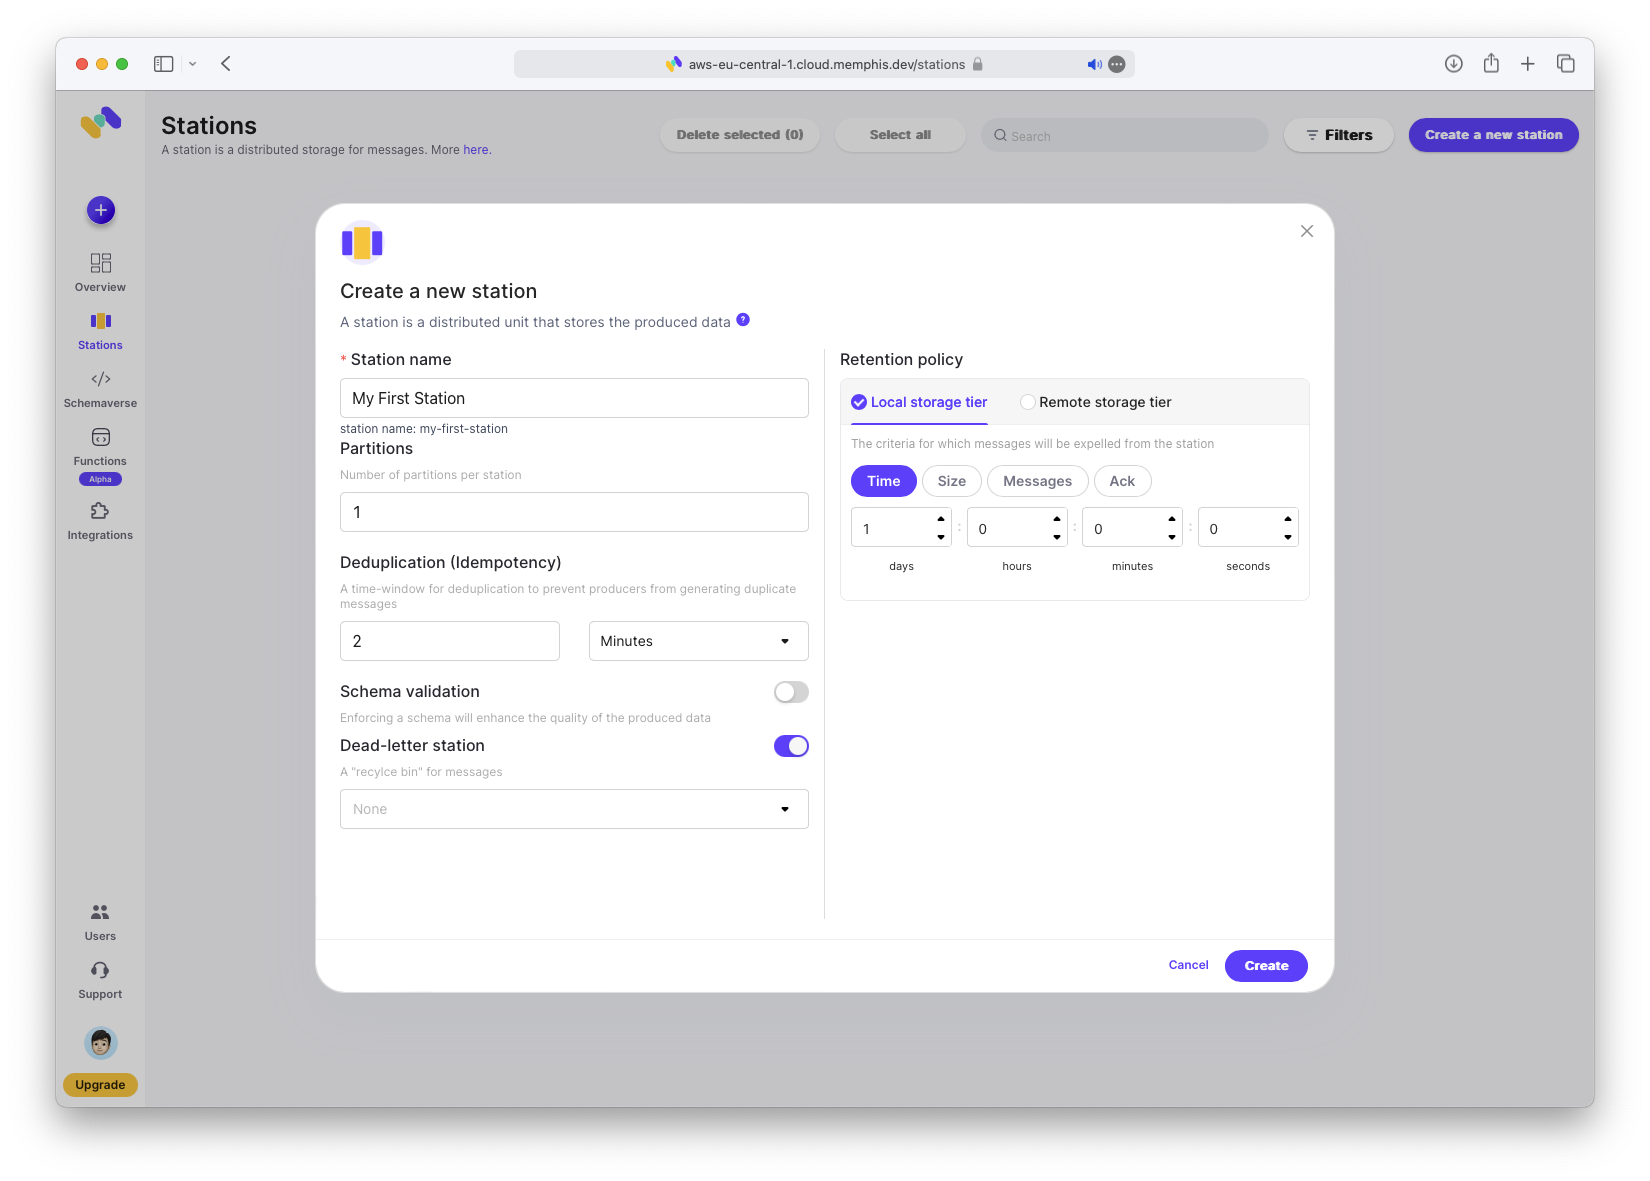
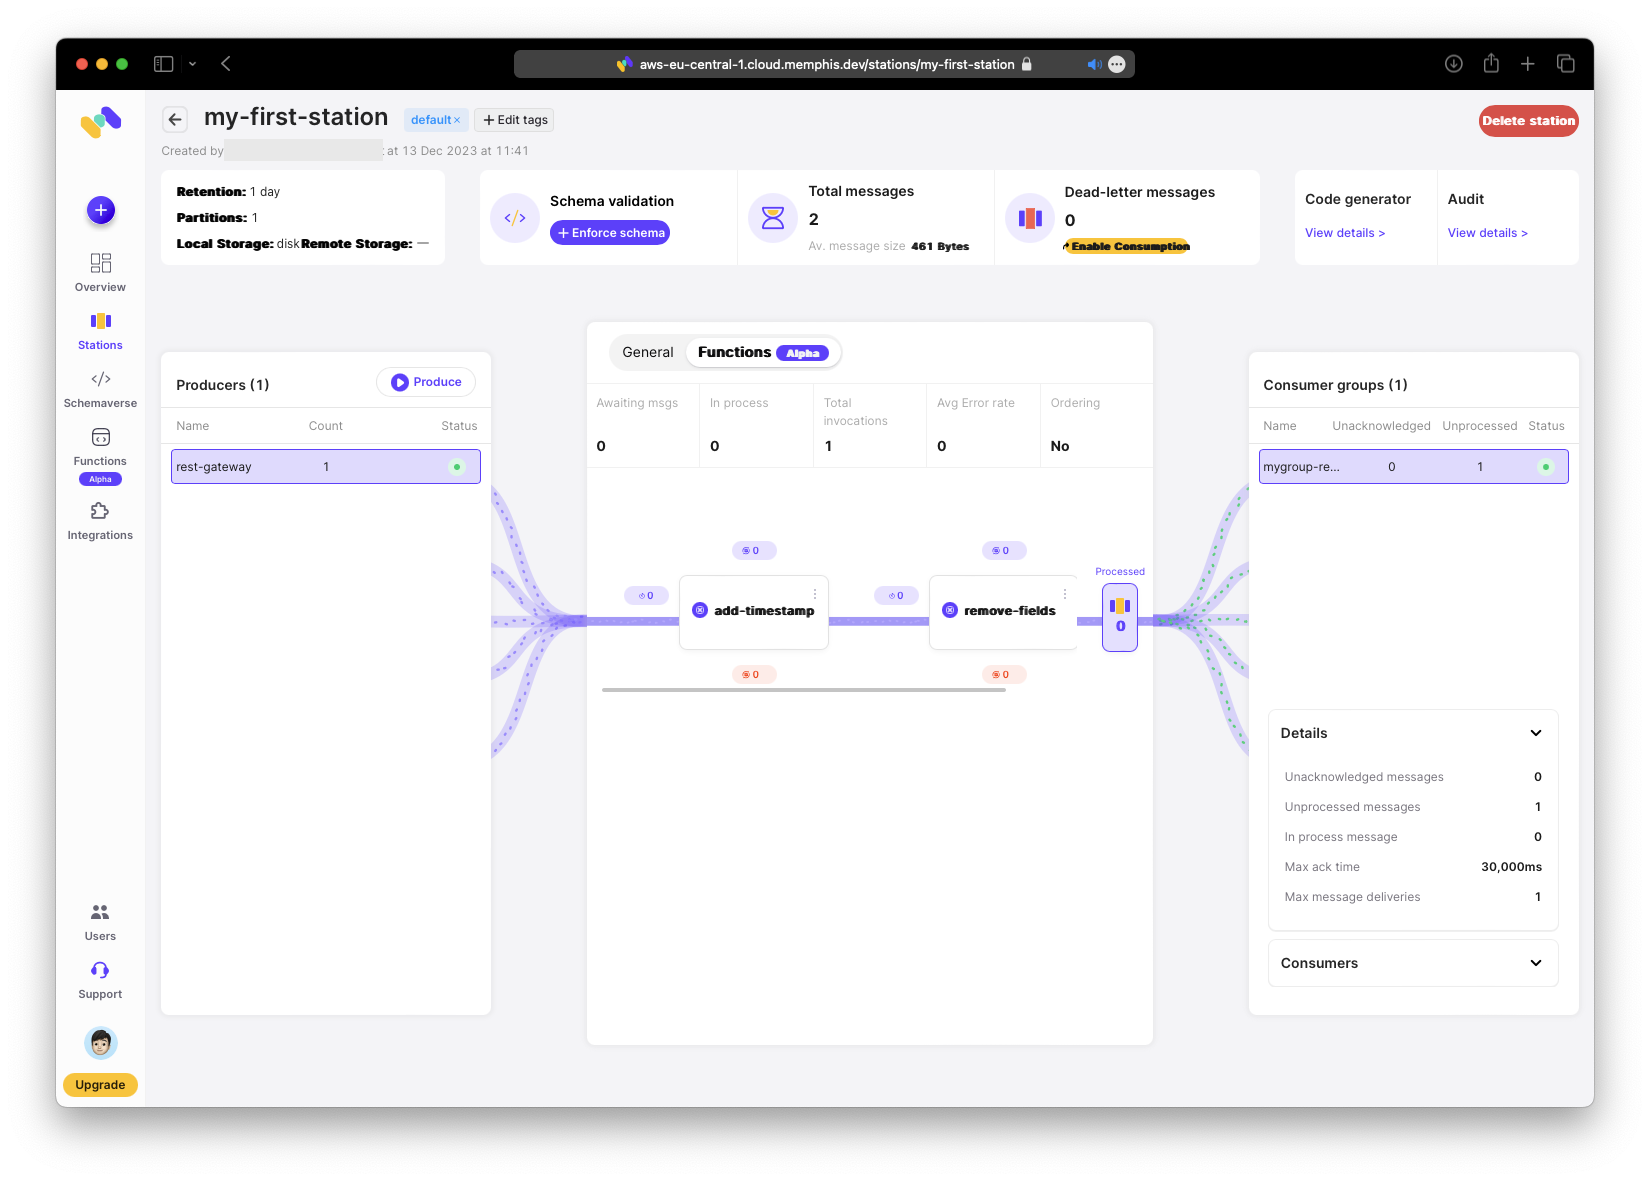
Now you can see the pipeline: input on the left, the station in the middle, and output on the right. The station will host our functions; more on that later.

Create JSON Web Token
To produce and consume messages we need a JSON Web Token (JWT) for authentication.
One UI note: the “Code generator” in the top-right is very useful; I ’d prefer it in a more prominent position, but that ’s a personal preference.
Create some REST calls using the code generator. You only need a user and password. Click “Generate JWT token”, then copy both the token and refresh token to a secure location.
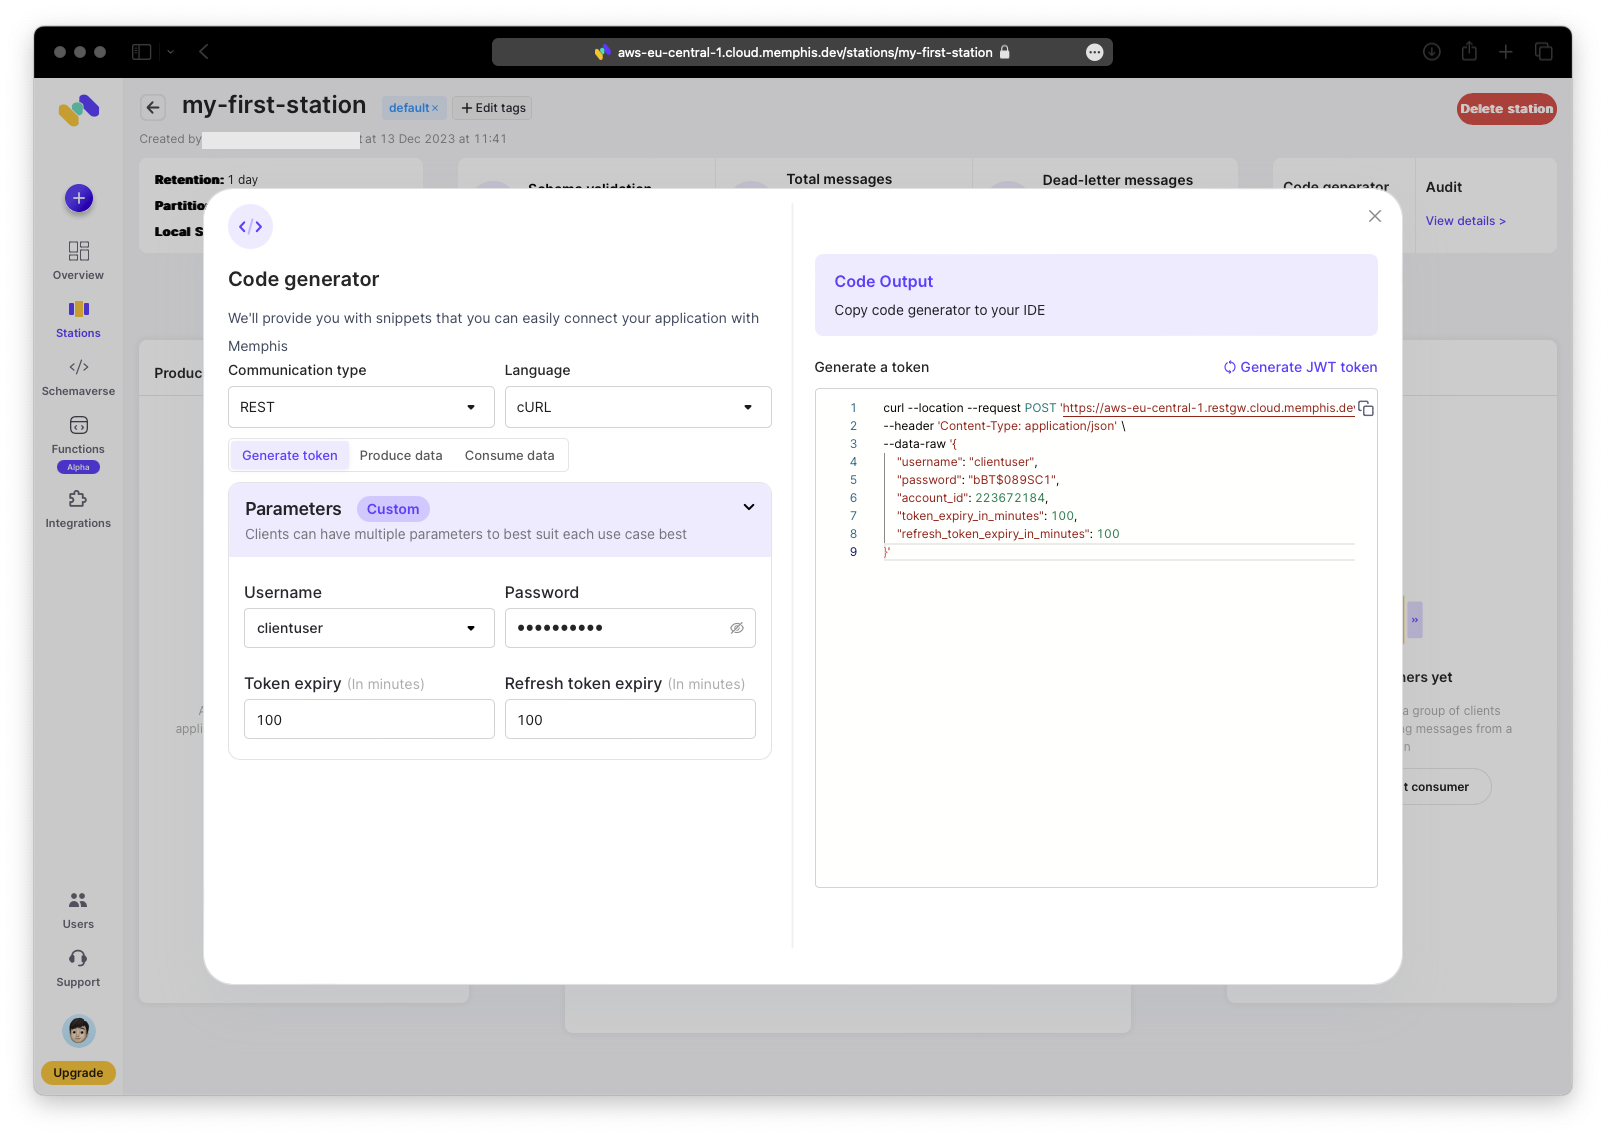
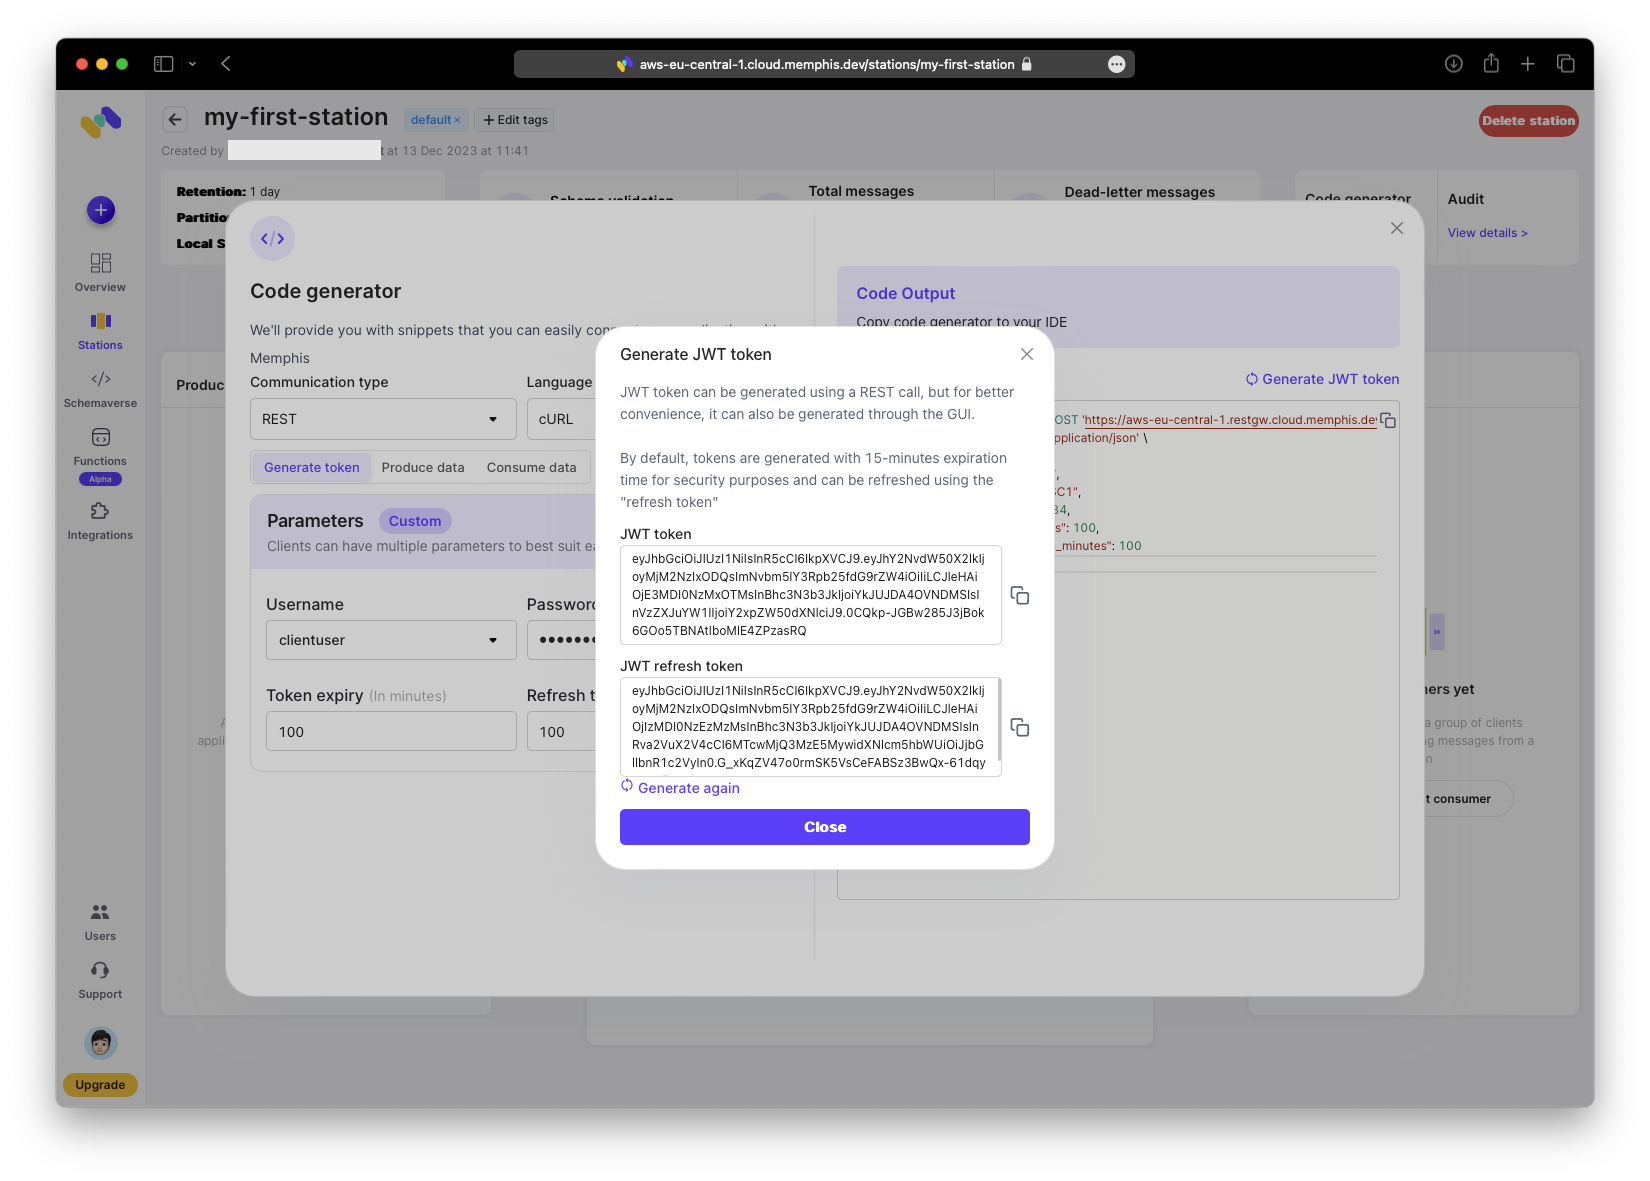
To use the curl command, paste it into your terminal and execute it.
% curl --location --request POST 'https://aws-eu-central-1.restgw.cloud.memphis.dev/auth/authenticate' \
--header 'Content-Type: application/json' \
--data-raw '{
 "username": "clientuser",
 "password": "bBT$089SC1",
 "account_id": 223672184,
 "token_expiry_in_minutes": 100,
 "refresh_token_expiry_in_minutes": 100
}'
{"expires_in":102148303560000,"jwt":"...","jwt_refresh_token":"...","refresh_token_expires_in":102148303560000}%
Produce Message
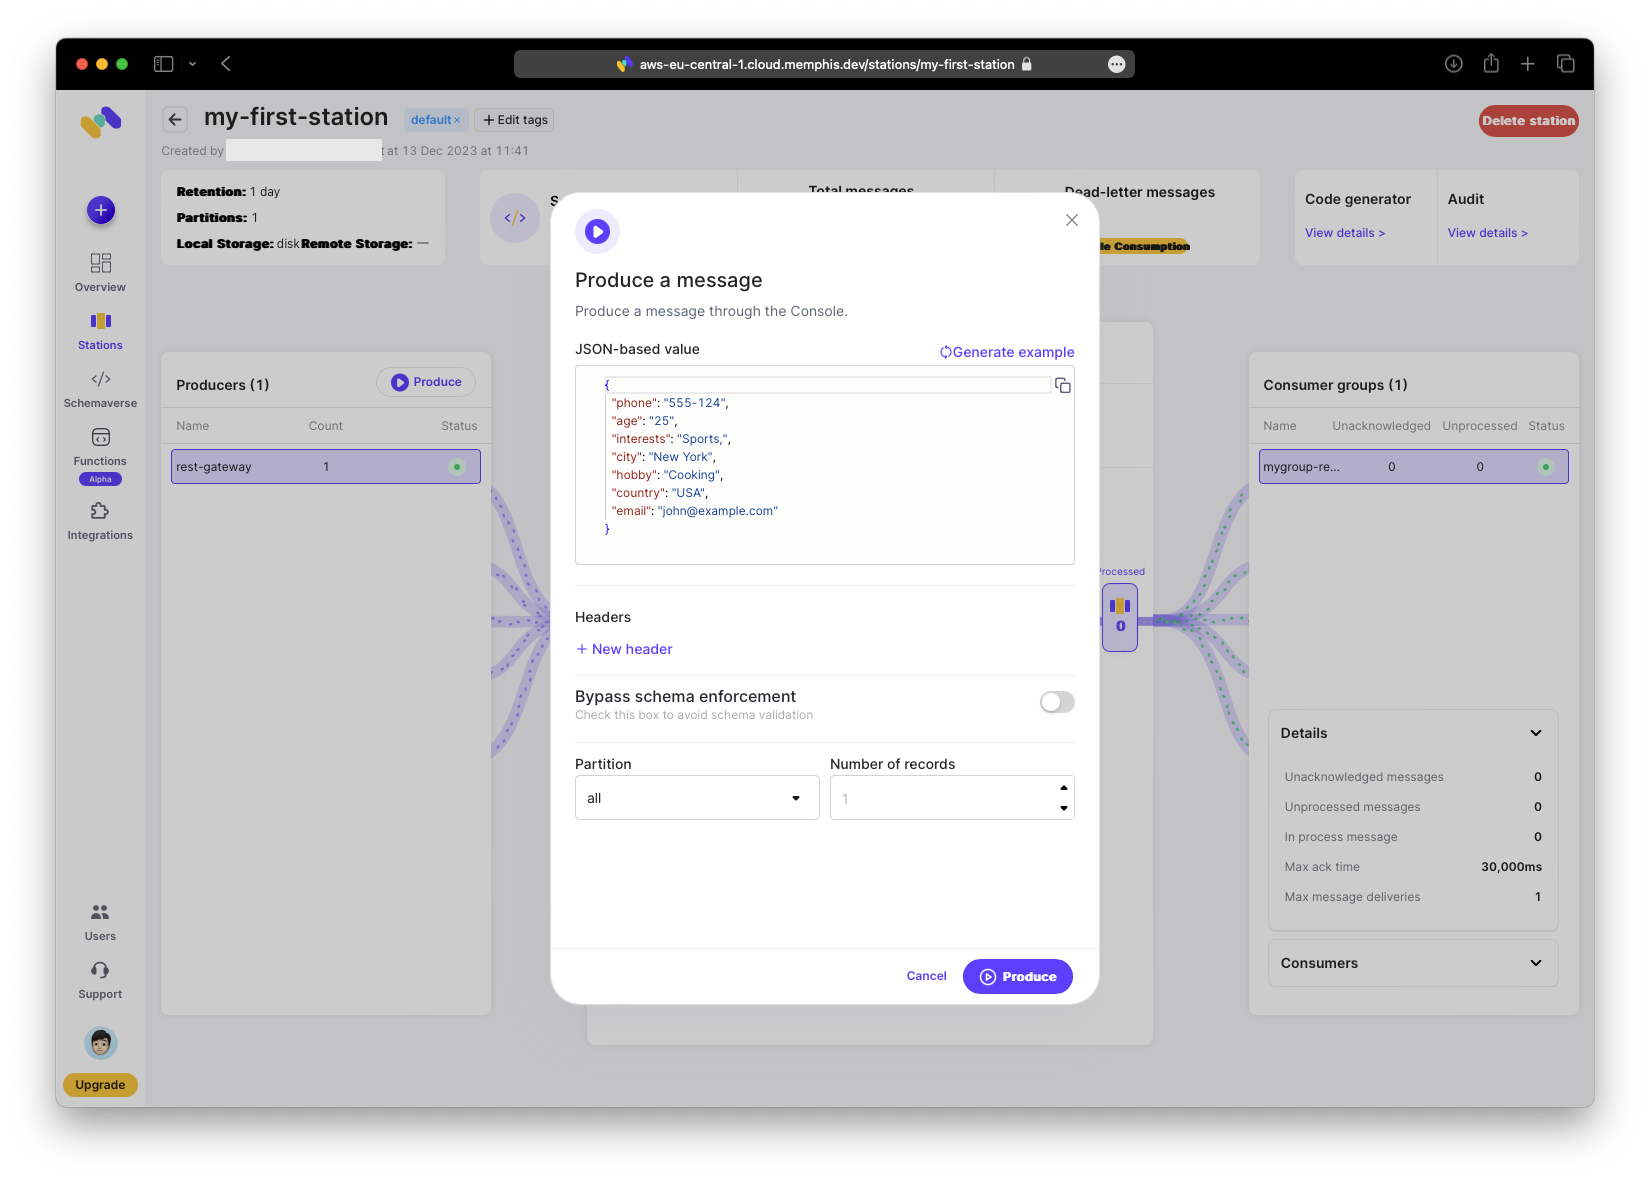
Now generate the first message. Open the code generator and switch to the “Produce data” tab.
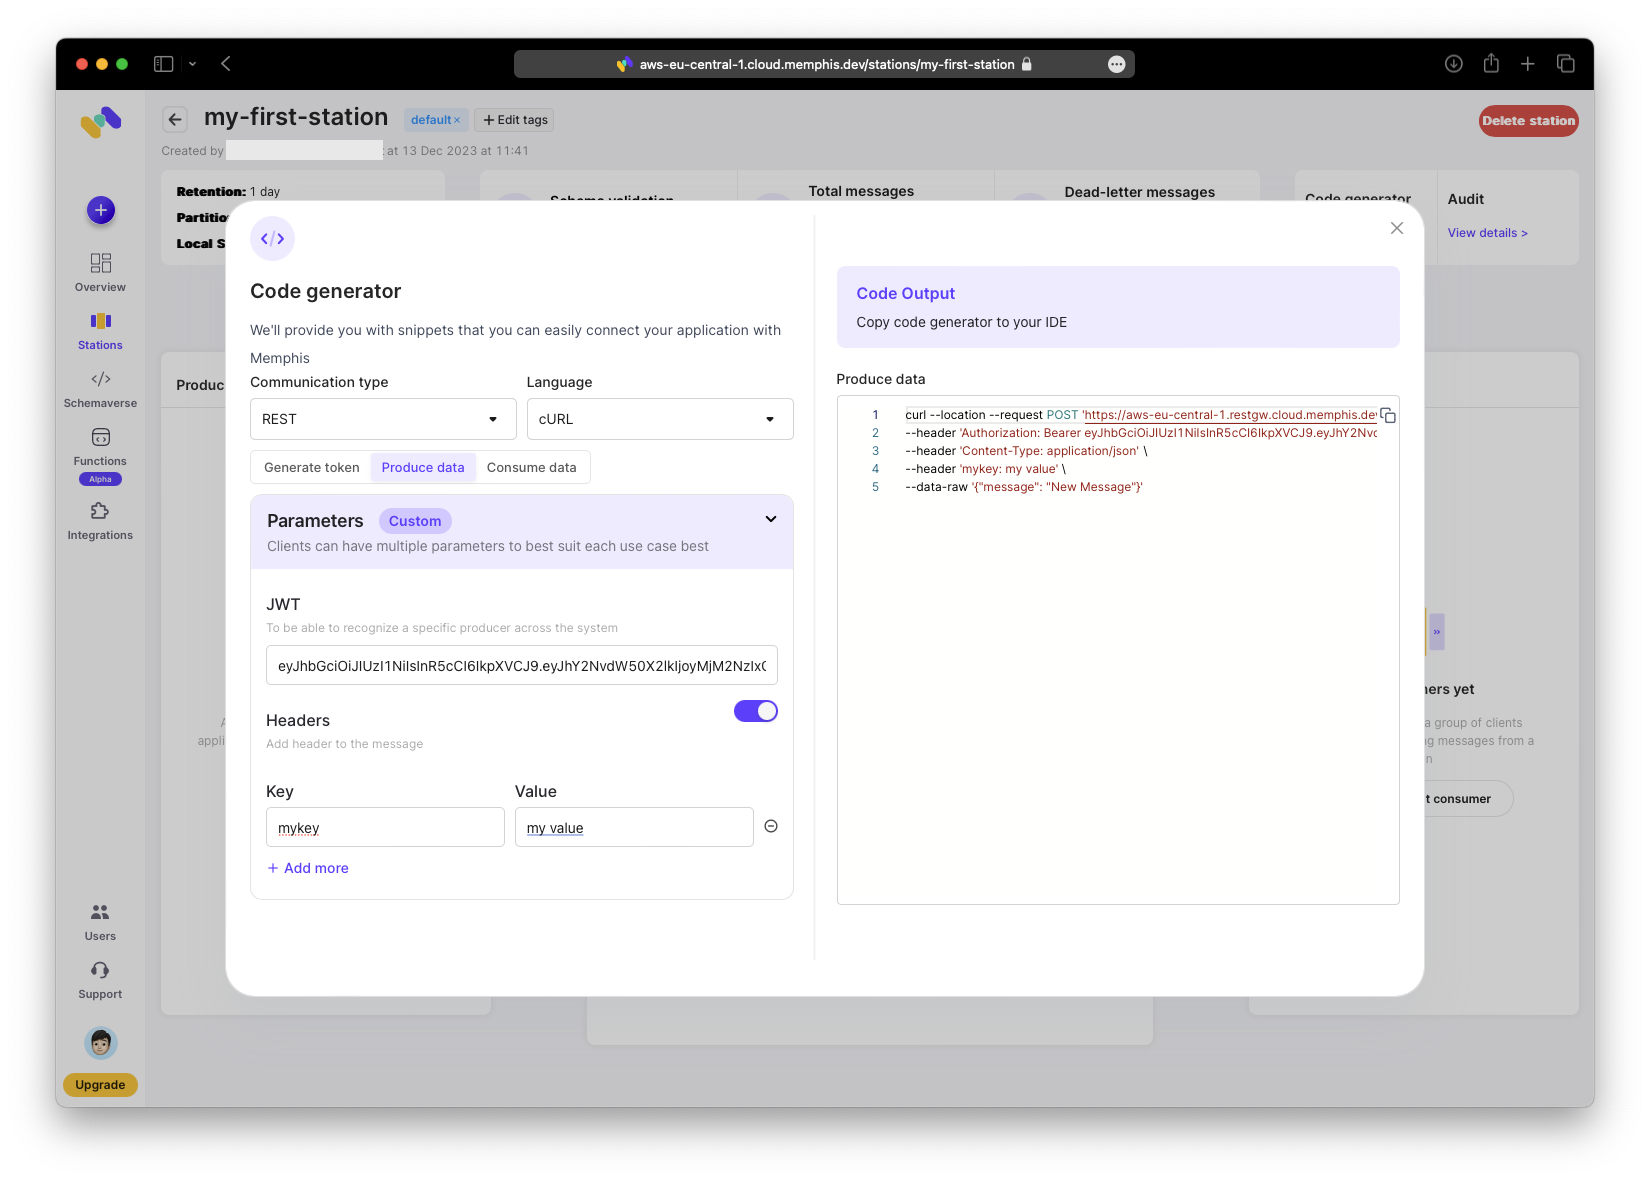
Copy the generated command into your terminal and execute it.
% curl --location --request POST 'https://aws-eu-central-1.restgw.cloud.memphis.dev/stations/my-first-station/produce/single' \
--header 'Authorization: Bearer eyJhbGciOiJIUzI1NiIsInR5cCI6IkpXVCJ9....' \
--header 'Content-Type: application/json' \
--header 'mykey: my value' \
--data-raw '{"message": "New Message"}'
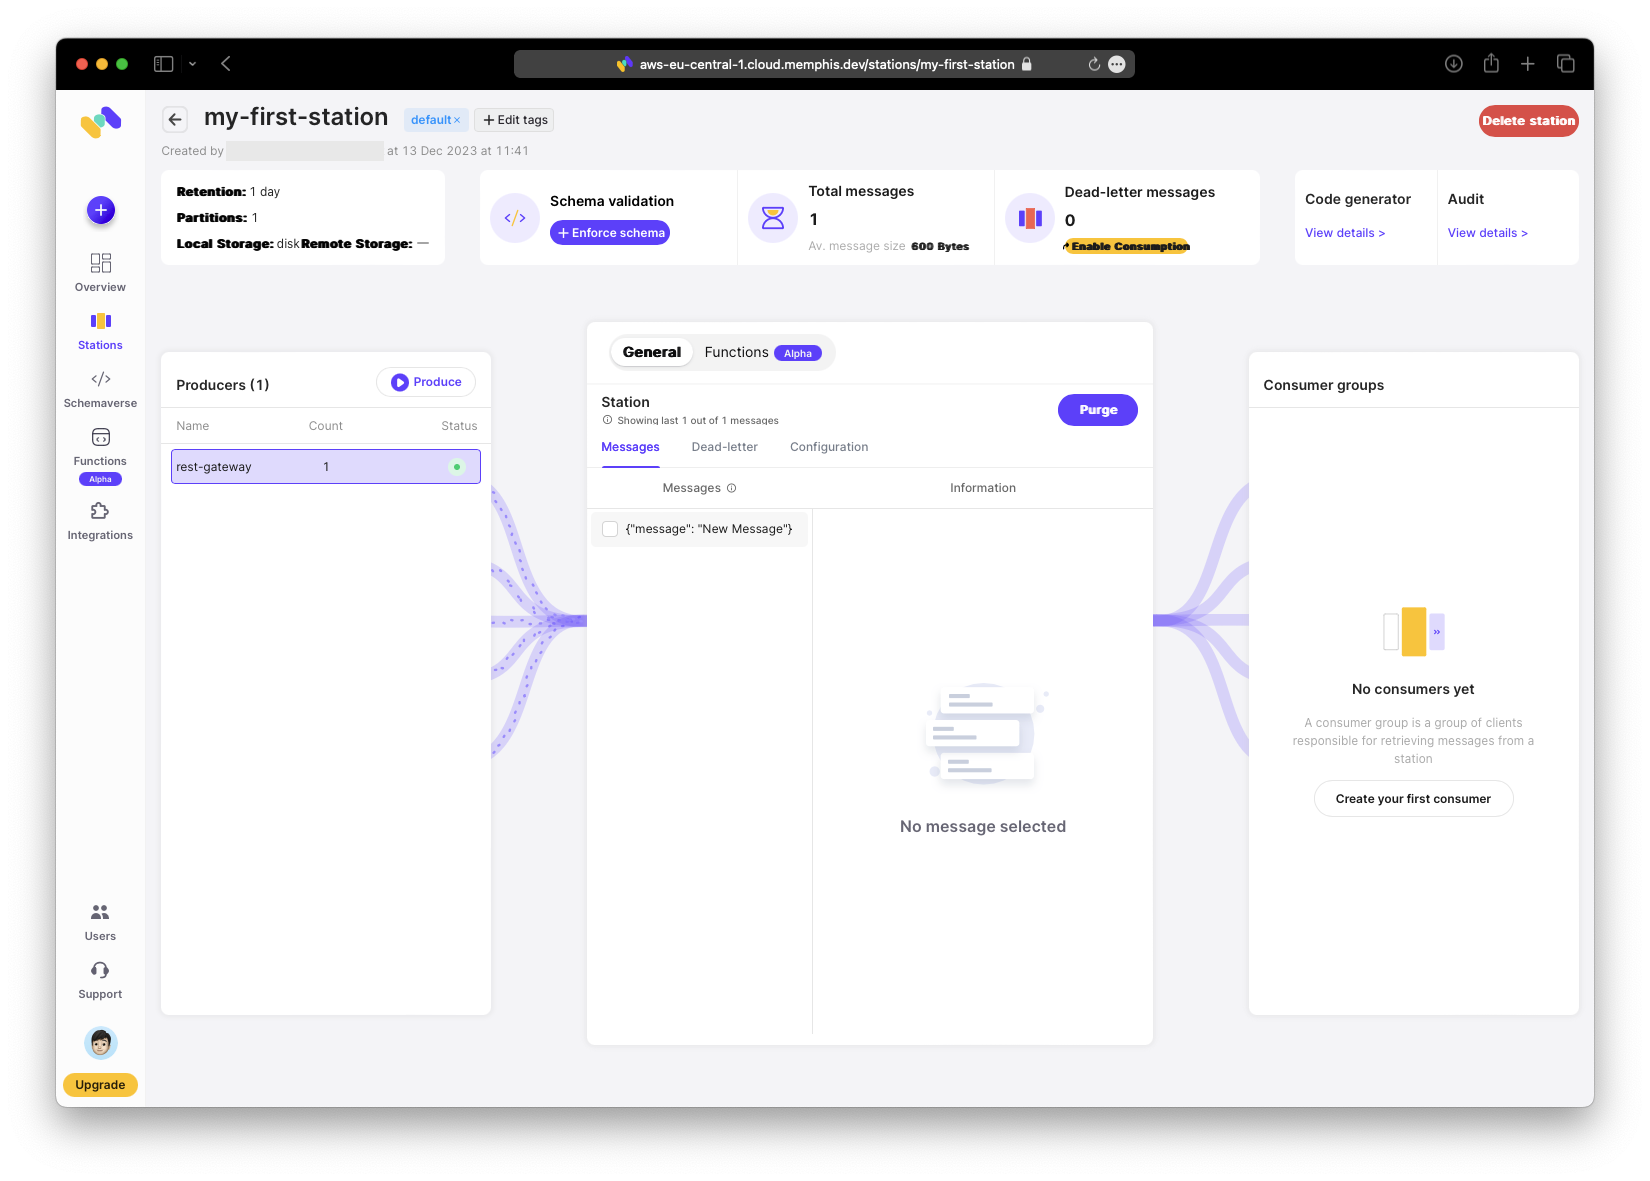
{"error":null,"success":true}%You can now view the received message in the station and inspect its details.
Consume Message
To consume the message, open the code generator, copy the consume command, and execute it.
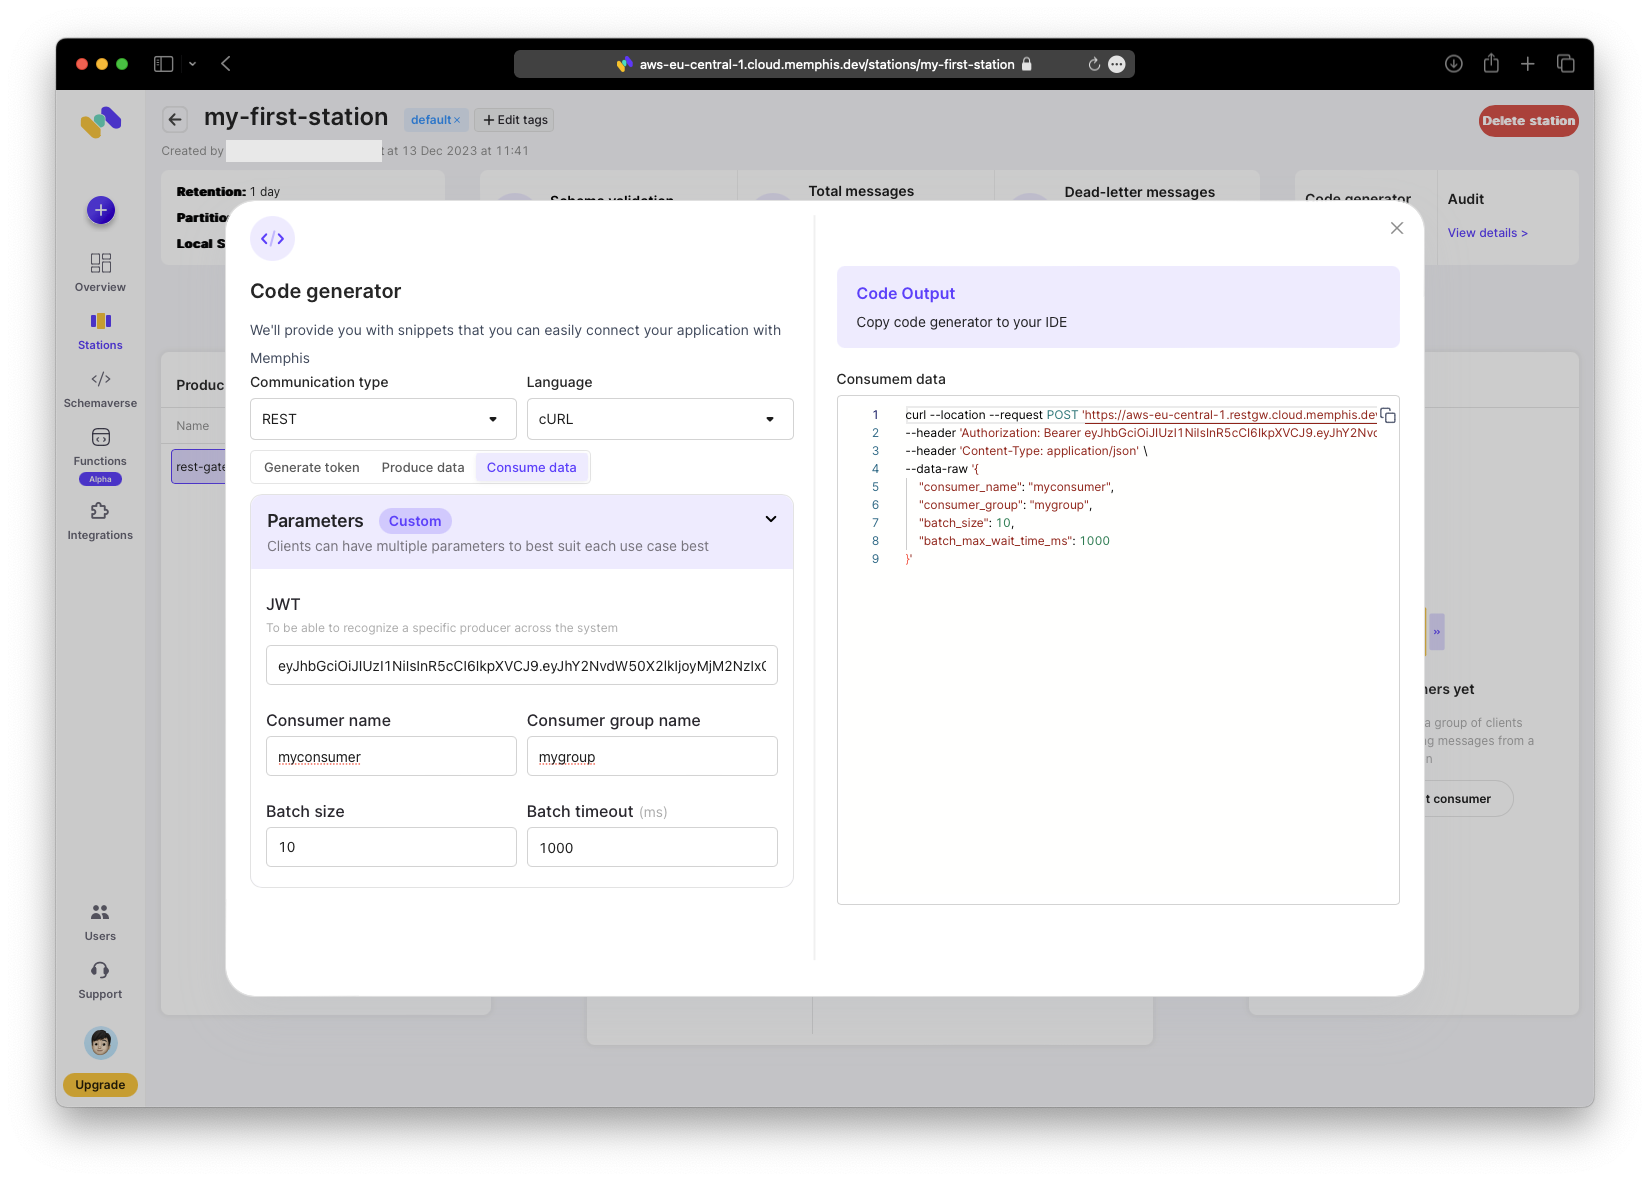
You will receive the previously generated message; it remains unchanged at this point.
% curl --location --request POST 'https://aws-eu-central-1.restgw.cloud.memphis.dev/stations/my-first-station/consume/batch' \
--header 'Authorization: Bearer eyJhbGciOiJIUzI1NiIsInR5cCI6IkpXVCJ9....' \
--header 'Content-Type: application/json' \
--data-raw '{
 "consumer_name": "myconsumer",
 "consumer_group": "mygroup",
 "batch_size": 10,
 "batch_max_wait_time_ms": 1000
}'
[{"message":"{\"message\": \"New Message\"}","headers":{...}}]%
Add Timestamp Function
Now the fun part: adding business logic to transform messages.
In your station click “Functions → Add function”.

Install the “add-timestamp” function.
After installation, test the function and attach it to your station.

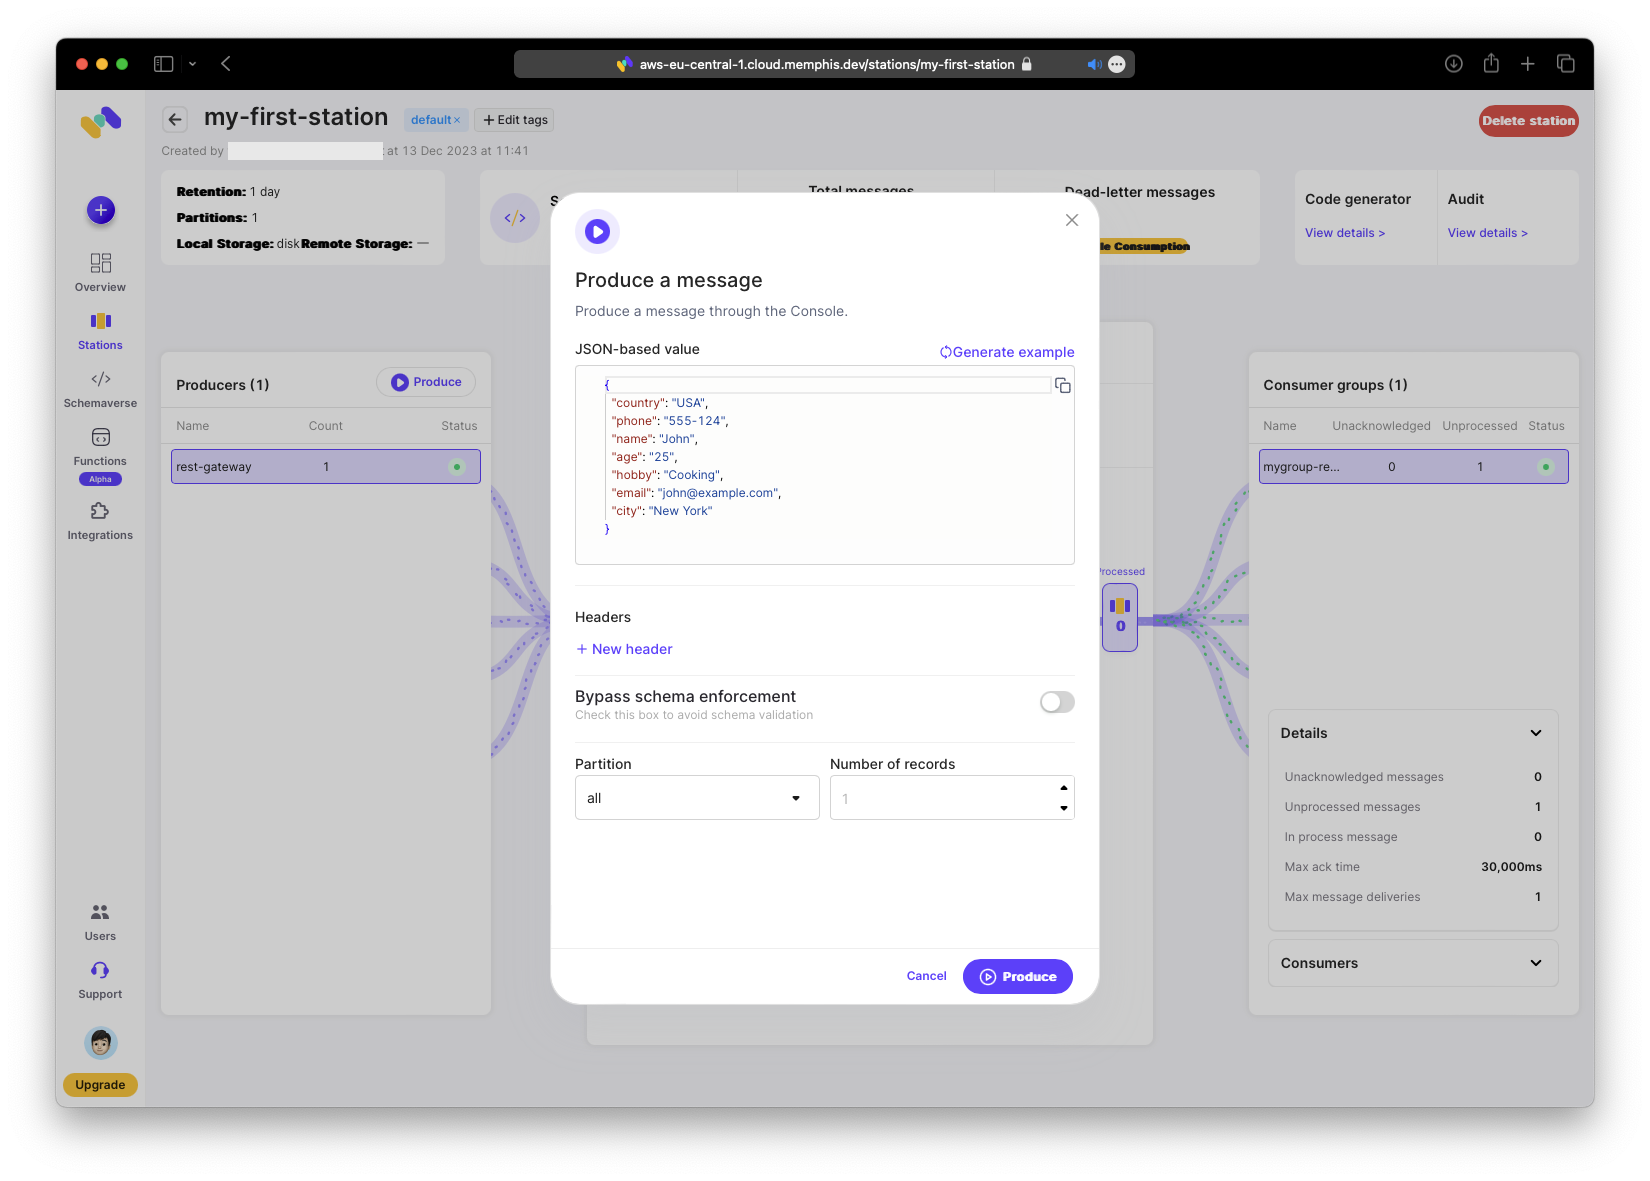
Any message produced now will have an additional timestamp field. Here I produce a message via the web UI to demonstrate that option.
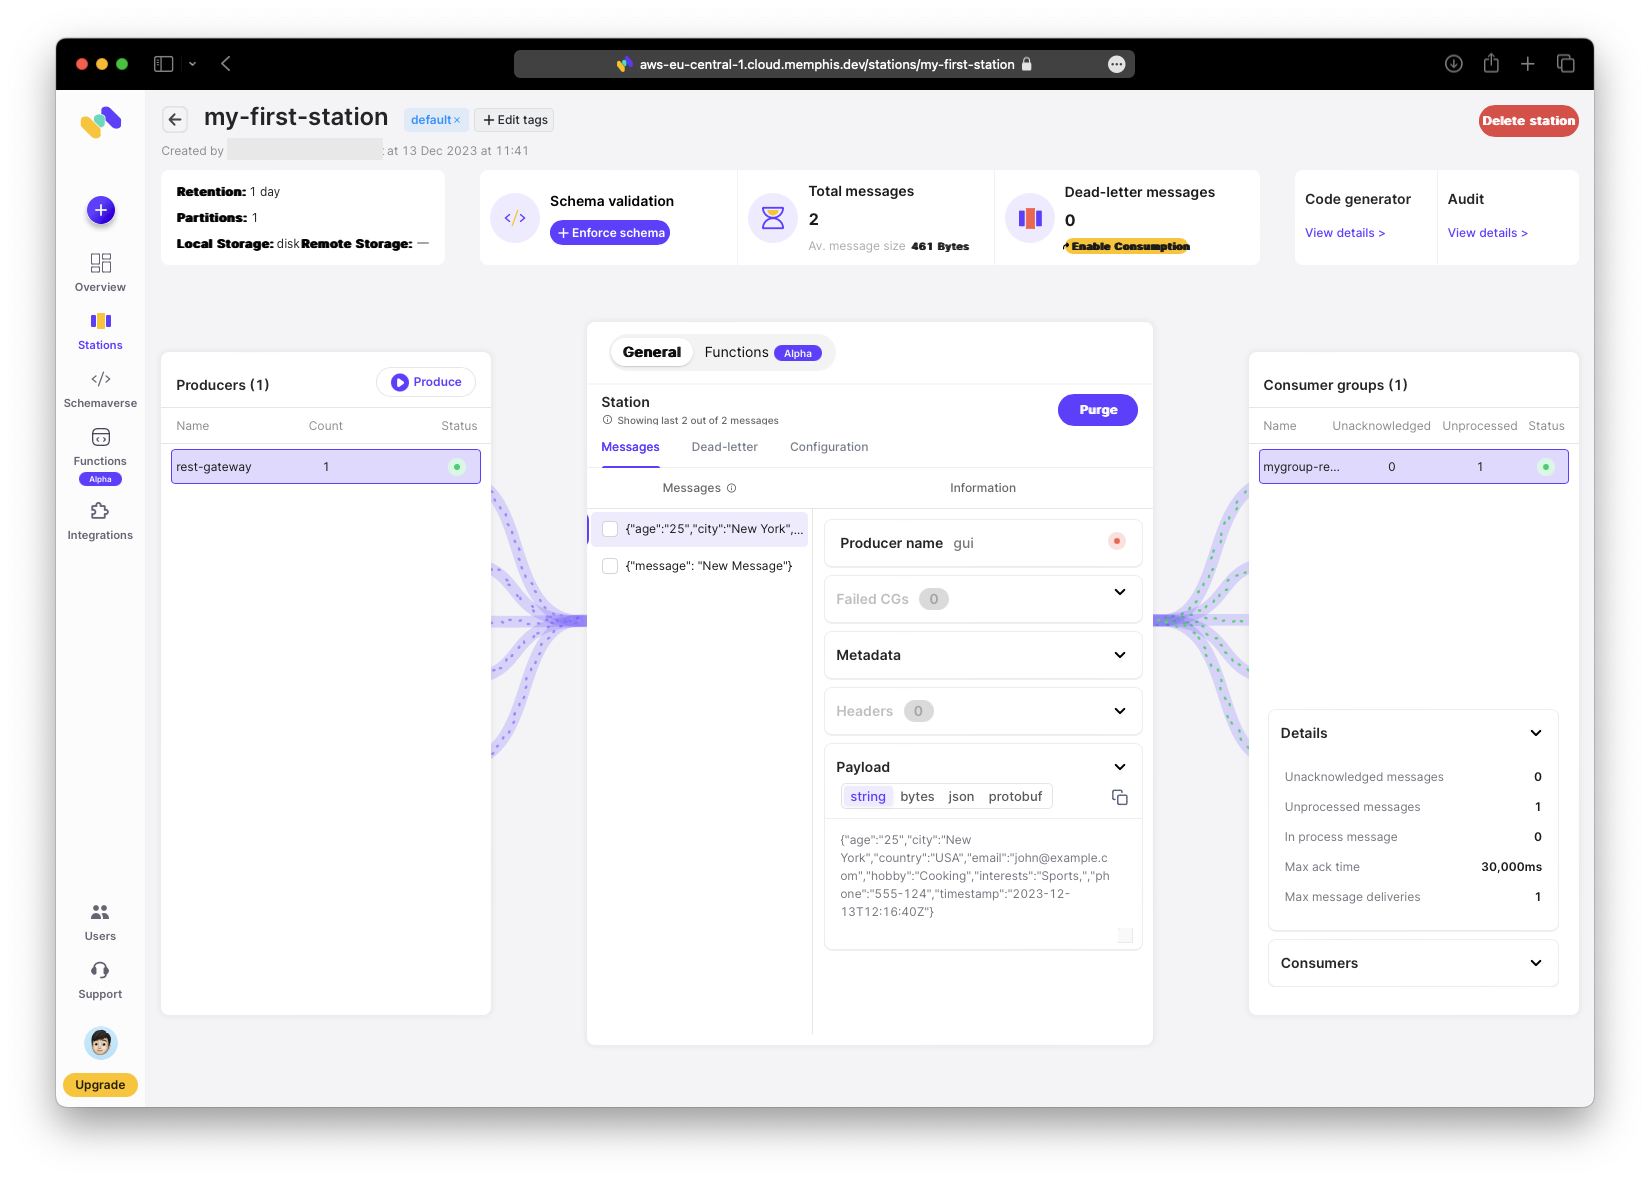
Now the received message includes a timestamp when viewed in the station.
Remove Data Function
Next, add a function for scrubbing data. As noted earlier, scrubbing personal information is often required by GDPR. In Germany, regulations on personally identifiable information (PII) are particularly strict, so designing applications to comply with GDPR from the start is important. Having an easy data-scrubbing mechanism provides flexibility and saves time and cost.
Memphis functions can also be used for pseudo-anonymization: replacing certain data with a key and storing the key separately. Readers of the original record will see only the key, not the PII. You could implement a function that replaces content with a generated key, for example.
In this tutorial, we will use the ready-made scrubbing function. I may explore private functions later to demonstrate pseudo-anonymization.
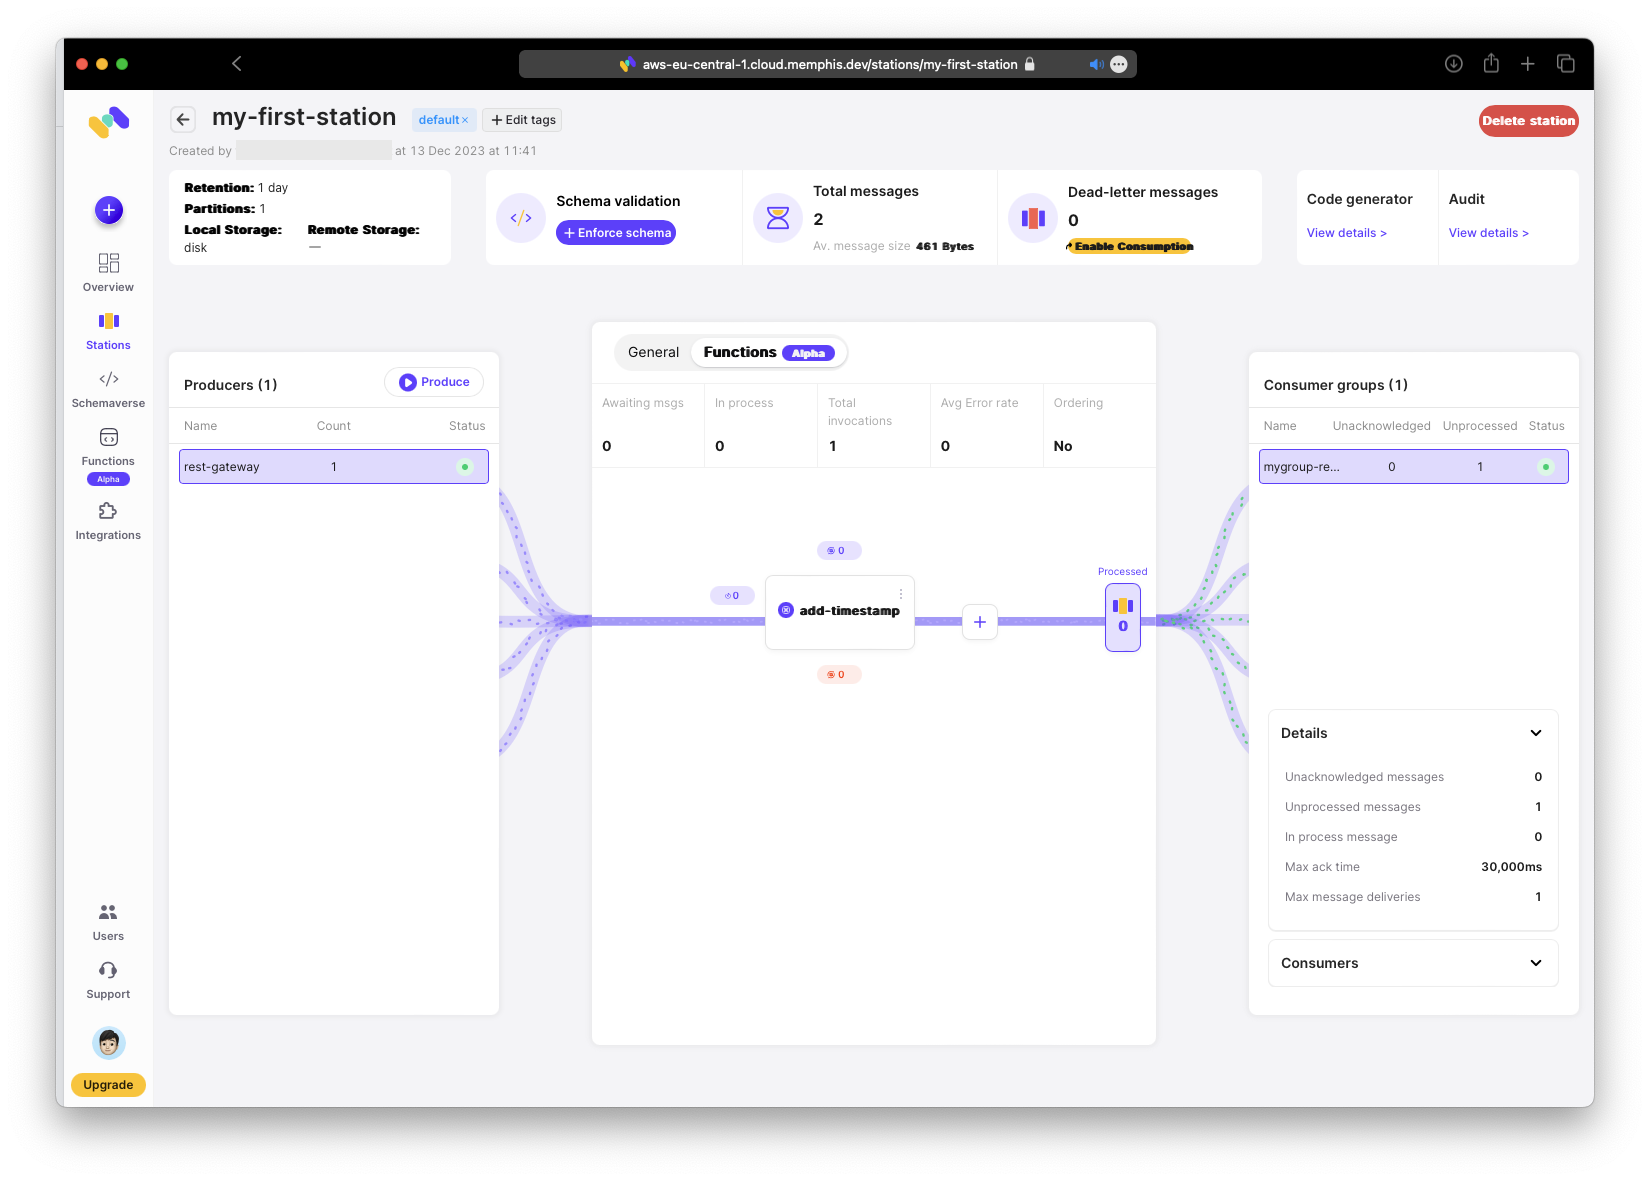
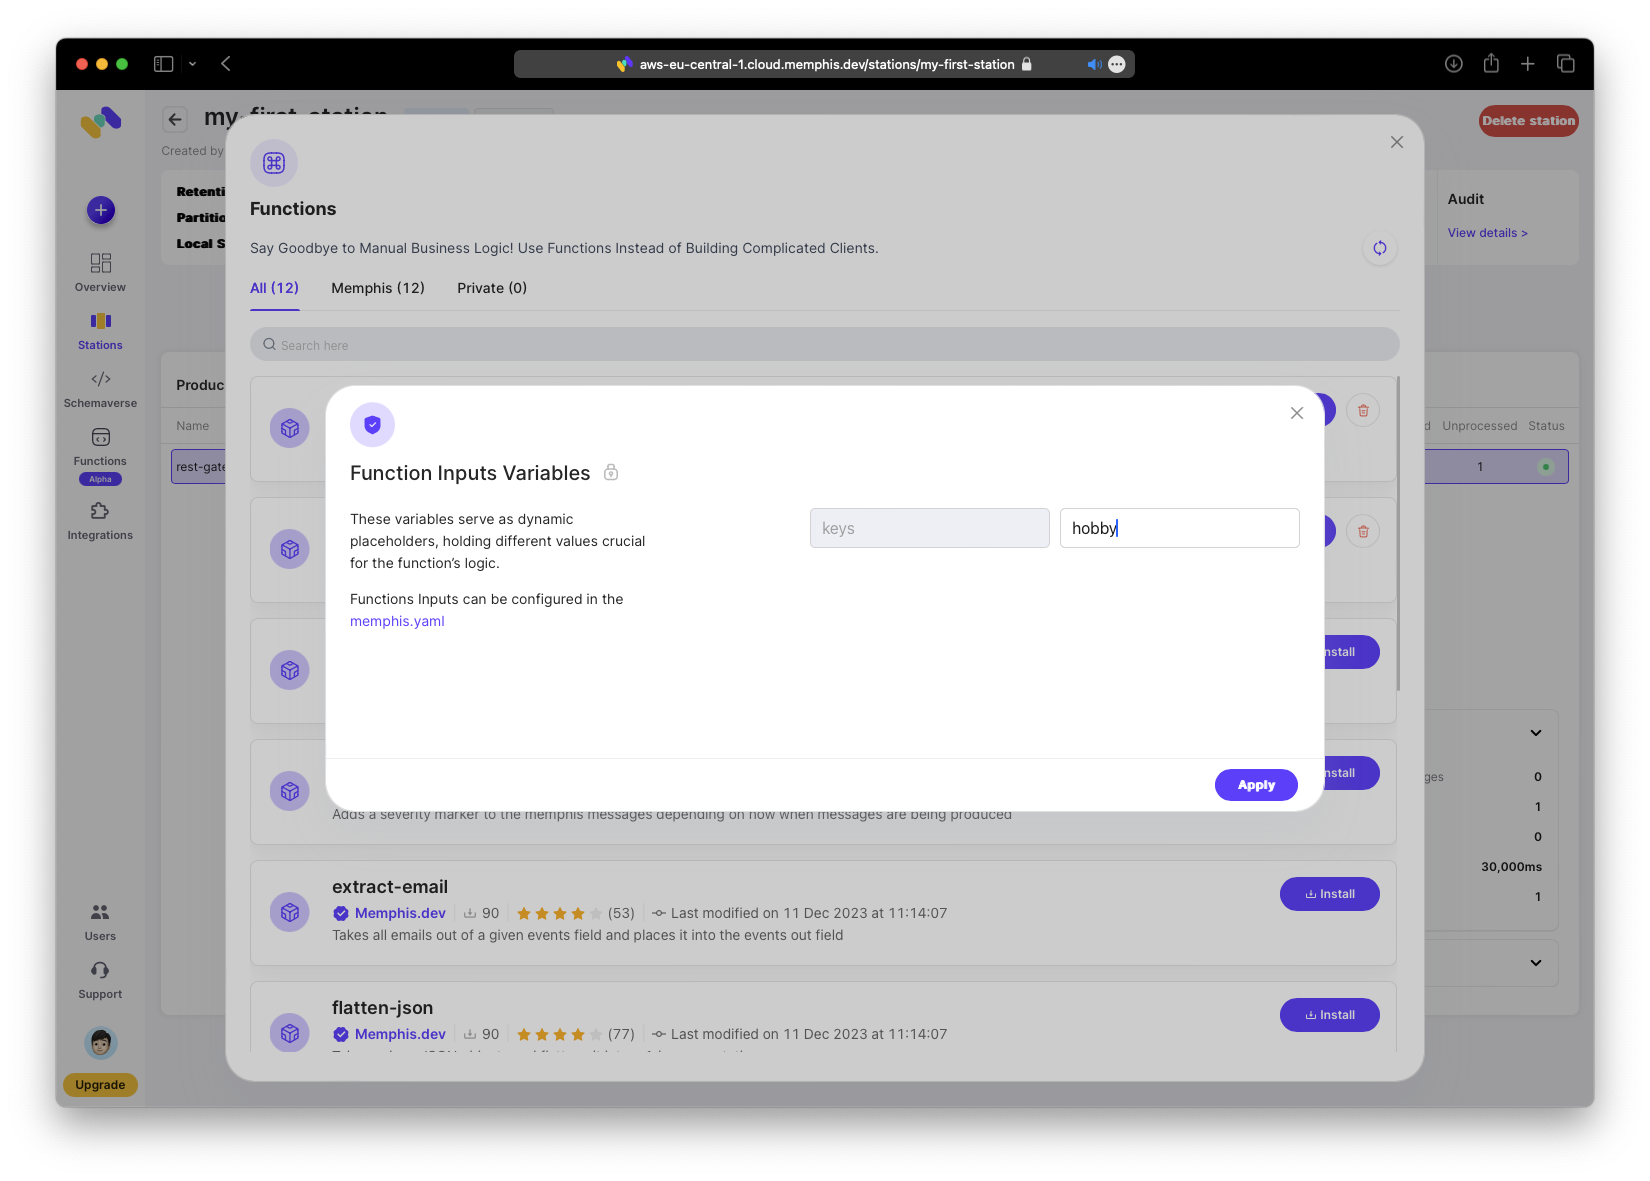
Under “Function,” click the ”+” button to add a new function to run after “add-timestamp”.
To install and attach the “remove-fields” function, add a parameter specifying the field name to remove. In this demo, remove the “hobby” field (the code generator template includes it).
Now you can see the second function in the station.
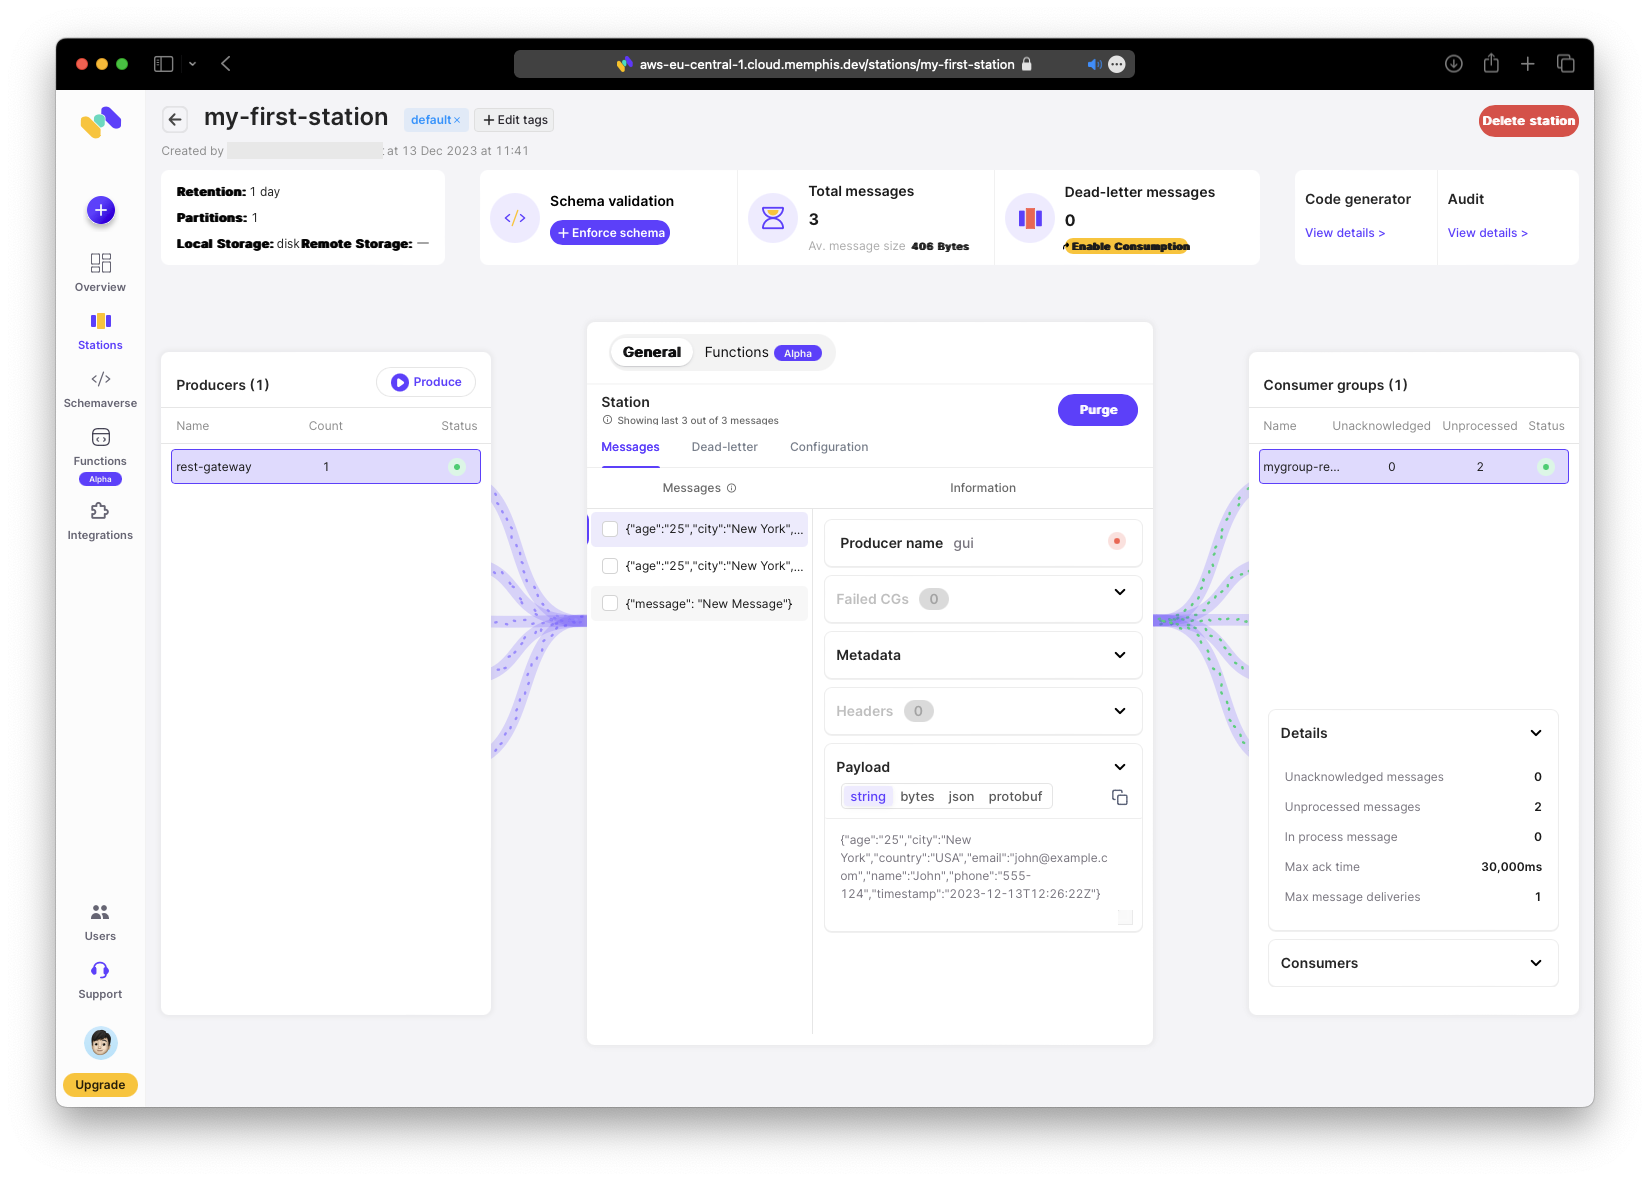
Test again by producing a new message.
Confirm that:
- the timestamp remains
- the hobby field is removed
Looks good!
Conclusion
This was a crash course on data pipelining with Memphis Functions. The feature already offers tangible benefits for developers, enabling greater efficiency and potential cost savings. There are a few UI issues, but I expect the Memphis team will address them.
The core offering seems reliable and worth further exploration. You can use private functions hosted in your GitHub repository to iterate locally and push updates to modify your pipeline.
In Part 2 we will create a GitHub repository for private functions, link it with Memphis, implement a custom function, and make it live. We will also explore Memphis ‘s “Schemaverse” for ensuring schema consistency across services.
Please share your thoughts on this post and the proposed follow-up in the comments below or send me a direct message.