Welcome to this first revision of my article “Event-Driven Architectures with Kafka and Python”.
In the original article, the event sent was a string. While this is sufficient for many use cases, most of mine require sending an object of a custom type.
Therefore I have changed the code and the tutorial to use object serialization and deserialization with JSON.
Of course, there are other methods for serialization and deserialization; a popular one is Avro.
Many roads lead to Rome; we’ll start with one and proceed with the tutorial.
Introduction
Event-driven architectures have become prominent in recent years, with Kafka being the de-facto standard for tooling.
This post provides a complete example of an event-driven architecture, implemented with two Python services that communicate via Kafka.
The main goal is to provide a working example without diving into details that would distract from getting something up and running quickly.
We have a couple of building blocks, mainly
- Infrastructure (Kafka, Zookeeper)
- Producer (Python Service)
- Consumer (Python Service)
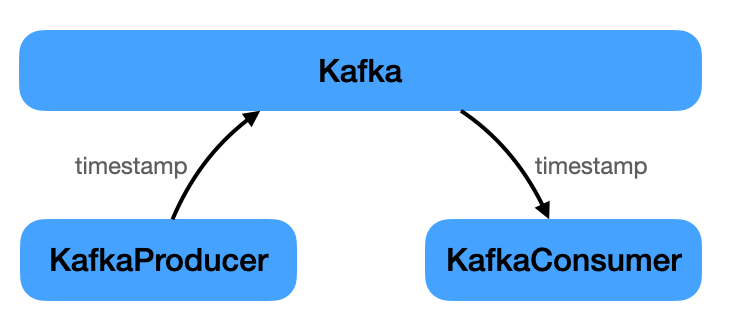
The producer ‘s sole task is to periodically send an event to Kafka. This event carries a timestamp. The consumer’s job is to listen for this event and print the timestamp.
The implementation produced the following project structure.

The complete code can be downloaded from here.
Infrastructure
Besides the services, only two components are needed to run an event-based architecture: Kafka and Zookeeper.
See the resources section at the end of the tutorial for links to both.
Kafka is the main component for exchanging events; Zookeeper is needed for several support functions. From the Zookeeper website:
ZooKeeper is a centralized service for maintaining configuration information, naming, providing distributed synchronization, and providing group services.
Below is the docker-compose.yml to get both running:
version: '3'

services:

 kafka:
  image: wurstmeister/kafka
  container_name: kafka
  ports:
  - "9092:9092"
  environment:
  - KAFKA_ADVERTISED_HOST_NAME=127.0.0.1
  - KAFKA_ADVERTISED_PORT=9092
  - KAFKA_ZOOKEEPER_CONNECT=zookeeper:2181
  depends_on:
  - zookeeper

 zookeeper:
  image: wurstmeister/zookeeper
  ports:
  - "2181:2181"
  environment:
  - KAFKA_ADVERTISED_HOST_NAME=zookeeper
Once in place, only the two services that implement the “business domain” are required. Here’s a very simple example: sending and receiving a timestamp.
Code Setup
There are two Python projects; all code for each is in its main.py.
Each has only one dependency listed in its requirements.txt:
kafka-python==2.0.2
Install this dependency for each project using the following command:
python3 -m pip install -r requirements.txt
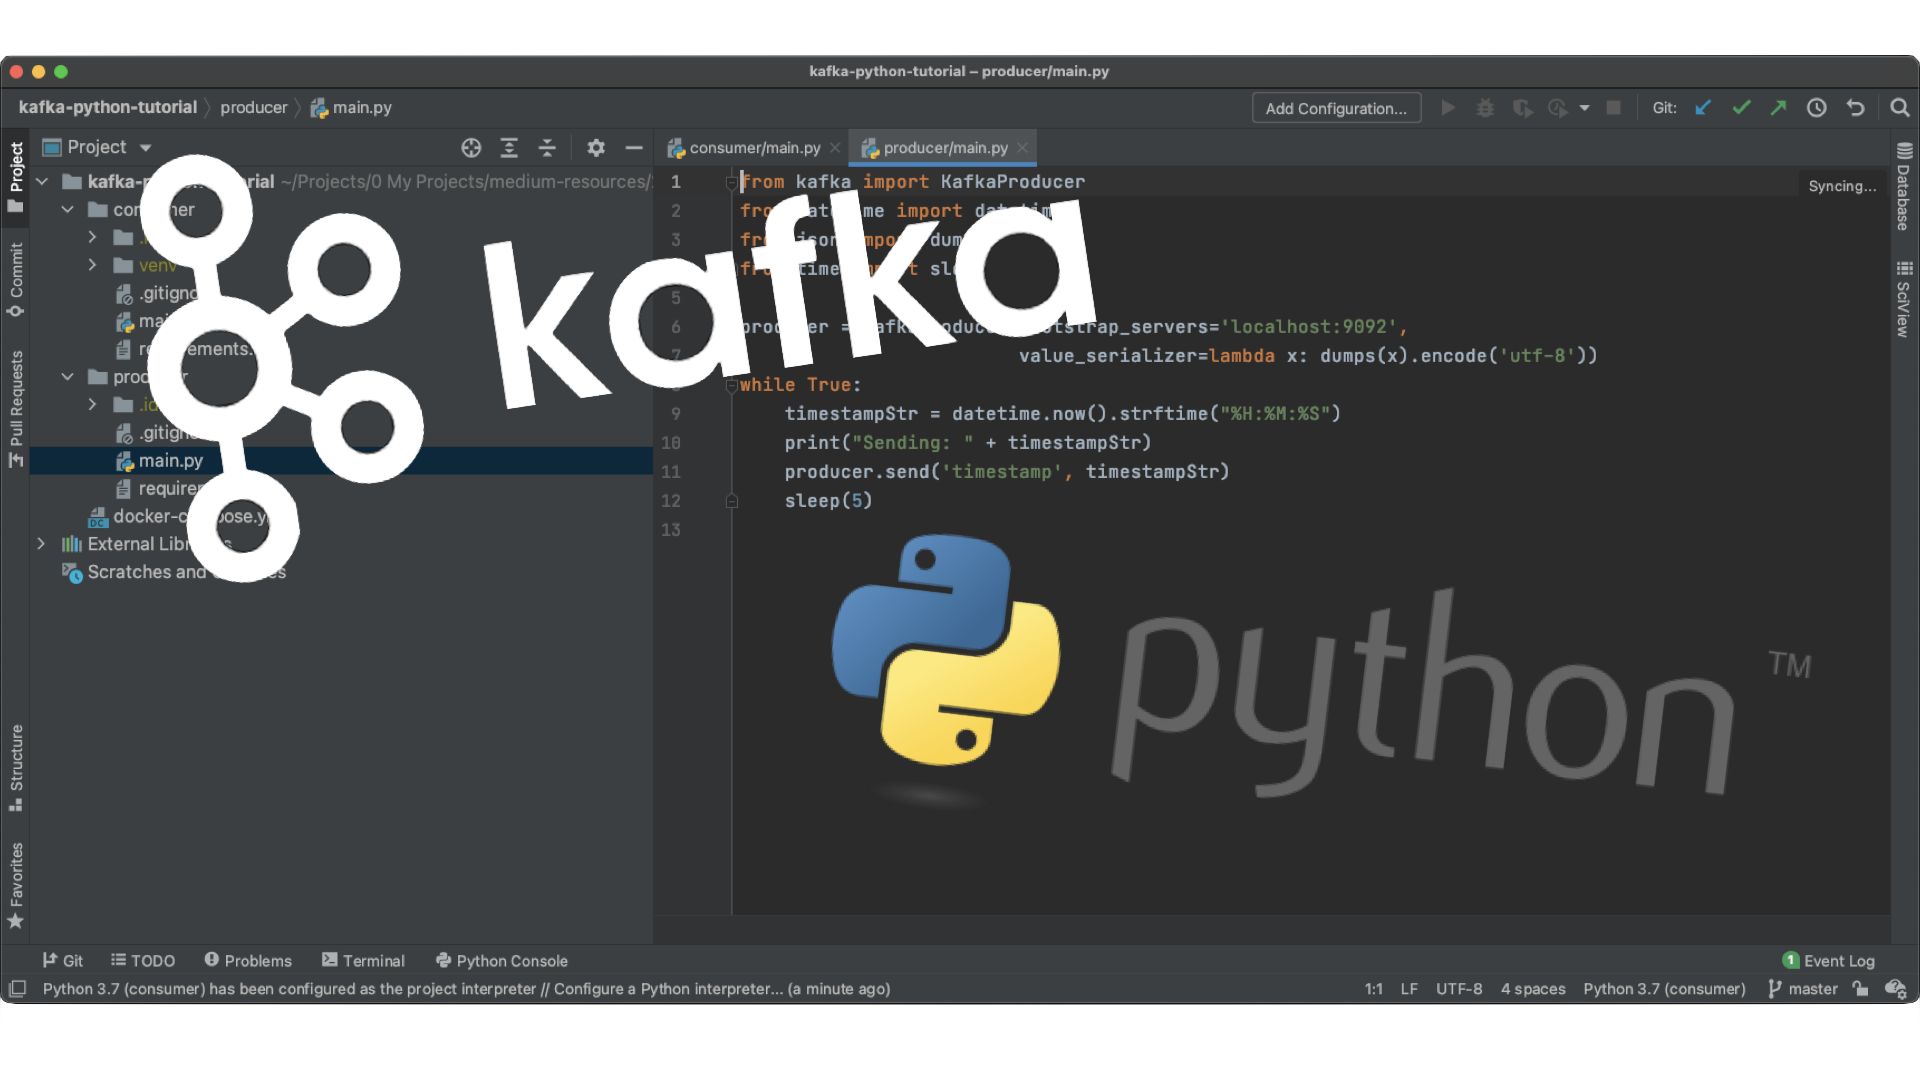
Producer
As mentioned above, the producer generates timestamps.
class TimestampEvent:
 def __init__(self, timestamp):
 self.timestamp = timestamp
These timestamps are published to Kafka for any interested consumers.
import json
from kafka import KafkaProducer
from datetime import datetime
from time import sleep

from TimestampEvent import TimestampEvent

producer = KafkaProducer(bootstrap_servers='localhost:9092',
       value_serializer=lambda x: json.dumps(x.__dict__).encode('utf-8'))

while True:
 timestampEvent = TimestampEvent(datetime.now().strftime("%H:%M:%S"))
 print("Sending: " + timestampEvent.timestamp)
 producer.send('timestamp', timestampEvent)
 sleep(5)
When creating the producer we provide two pieces of information:
bootstrap_servers: where to find Kafka. This could have been omitted becauselocalhost:9092is the default.value_serializer: how messages will be encoded.
Messages will be sent to the timestamp topic. This is relevant so the consumer can listen only to messages from this topic.
That is all for the producer. On to the consumer…
Consumer
The data structure for timestamps is identical to the producer’s.
class TimestampEvent:
 def __init__(self, timestamp):
  self.timestamp = timestamp
Now we’ll receive the timestamps that the producer sent.
from kafka import KafkaConsumer
import json

from TimestampEvent import TimestampEvent

consumer = KafkaConsumer('timestamp',
    value_deserializer=lambda x: json.loads(x.decode('utf-8')))

for message in consumer:
 timestampEvent = TimestampEvent(**(message.value))
 print("Received: " + timestampEvent.timestamp)
This time we have not provided bootstrap_servers as we did with the producer. It defaults to localhost:9092.
The necessary parameters provided are:
- The topic the consumer listens to:
timestamp value_deserializer: how messages are decoded after being received
Everything is in place now. Ready for action.
Run Example Code
Now run everything. Remember the following project structure:
event-driven-architectures
- docker-compose.yml
- python-tutorial
-- producer
--- main.py
-- consumer
--- main.py
In the event-driven-architectures directory, Kafka and Zookeeper are started via docker-compose:
docker-compose up -d
Change into the producer directory and start the service with:
$ source venv/bin/activate
(venv) $ python3 main.py
Finally, in a new terminal window, change into the consumer directory and start the service the same way:
$ source venv/bin/activate
(venv) $ python3 main.py
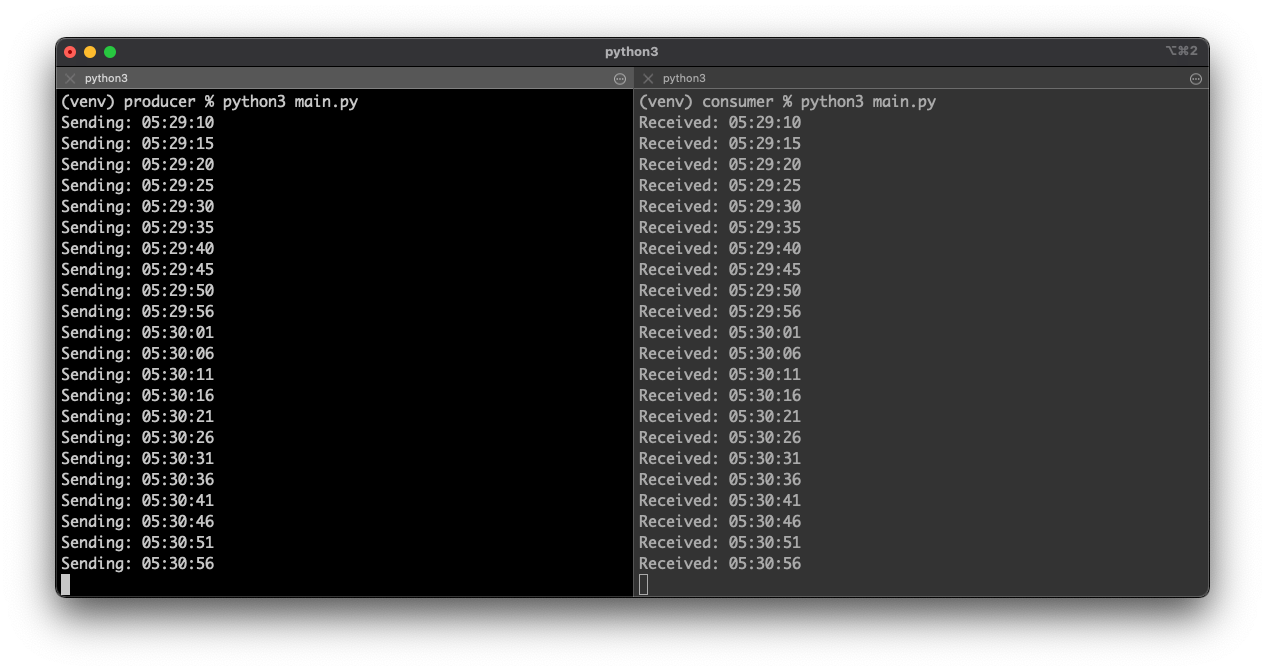
Now you should see something like this. On the left is the producer log output; on the right is the consumer log output.
Congratulations if you made it this far. It should have been straightforward to follow. If not, let me know how I can improve this tutorial.
Cleanup
When done, you can leave the Python environment by typing:
deactivate
(venv) $ deactivate
The Docker services are still running. They need to be stopped and cleaned up as well.
The command below performs the following:
- Stop all running Docker containers
- Remove stopped Docker containers
- Remove all volumes
$ docker-compose stop && docker-compose rm -f && docker volume prune -f
Stopping kafka      ... done
Stopping kafka-python-tutorial_zookeeper_1... done
Going to remove kafka, kafka-python-tutorial_zookeeper_1
Removing kafka      ... done
Removing kafka-python-tutorial_zookeeper_1... done
Deleted Volumes:
e4380413983bb36f914621dac4019565cd9ed130c04c5336c898874b648c2c92
120ab4ab7e227bdc5ee155d1cc61f29b1b0f8d7ed2fa9ee29deb05c90e33b8fe
0636bf46ec05cdda15deec280cdef672c68366a7d8d57ff424938069498e4063

Total reclaimed space: 67.13MB
Conclusion
This concludes the tutorial on creating an event-driven architecture using Kafka and Python.
The complete project code can be downloaded here.