Do you want a PlayStation 5 but
- you are tired of constantly hitting the browser’s “Refresh” button to check if the shop has it in stock,
- it is always sold out one minute after some online shop offered it,
- you are totally annoyed by software developers who created those bots that buy all the PlayStations in no time?
Well, why not fight fire with fire and write your own bot?
This post is a tutorial on how to create a web bot with Selenium in Python. This bot will constantly check a product page for the PlayStation 5 on a popular web shop in Germany.
I have made a video showing two scenarios. In the first, the browser periodically refreshes and checks the product page of the PlayStation 5 to see if it is available. At the time of recording it was not available, so to demonstrate the rest of the purchasing process I chose a product that is available.
Don’t worry if you need a bot for another shop— the code is simple and can easily be adapted. There are some links in the “Resources” section at the end of the document that might help you dig deeper.
The code can be downloaded from here: https://github.com/twissmueller/playstation-bot/tree/master
Disclaimer: Please check the license inside the code repository. In short: the code is provided as-is. You can do whatever you want with the code, but don’t blame me if you accidentally clear your bank account.
What you need is a computer with:
- Python 3 and pip
- Chrome and ChromeDriver
Please make sure your Chrome version matches ChromeDriver.
$ chromedriver --version
ChromeDriver 94.0.4606.41 (333e85df3c9b656b518b5f1add5ff246365b6c24-refs/branch-heads/4606@{#845})
You can get the code from this link: TODO GITHUB LINK
When everything is in place, change into the directory and activate the Python environment.
cd playstation-bot
source bin/activate
Then install the requirements with:
python3 -m pip install -r requirements.txt
Now edit the script and provide the username and password for the shop and, of course, the right product you want to purchase. Please see lines 6 to 9.
Finally, run the script:
python3 app.py
Depending on which product is addressed, the script either refreshes the page periodically or puts the product into the basket and continues with the checkout process.
There is one caveat: the script does not run through the payment process because this depends on the preferred payment option. Additionally, some payment providers like PayPal may use 2-factor authentication, which makes automation more complicated.
To implement the rest, some more work is required, but at least the product is already in the basket. Feel free to fork the repo and finish what has to be done.
How Does It Work?
Let’s get a little into the technical details.
What is Selenium and how can it be used to buy a PlayStation?
From the Selenium website:
Selenium is a suite of tools for automating web browsers.
It is as simple as that.
Selenium mimics the user so we can automate certain tasks, e.g., testing complete websites.
Breaking it down, in this tutorial we emulate three simple tasks a user normally does when visiting a website:
- open the browser and navigate to the product page
- click a few buttons
- fill in a form
Easy— there is not much more behind it. Really.
The code snippet to open the product page is:
PRODUCT = "<product_link>"
driver = webdriver.Chrome()
driver.get(PRODUCT)
Only the PRODUCT variable needs to be changed to adapt the script to another product. Xbox anyone?
Now the browser with the product page is open and the next steps, e.g., checking whether the “Add to Cart” button can be pressed, can be executed.
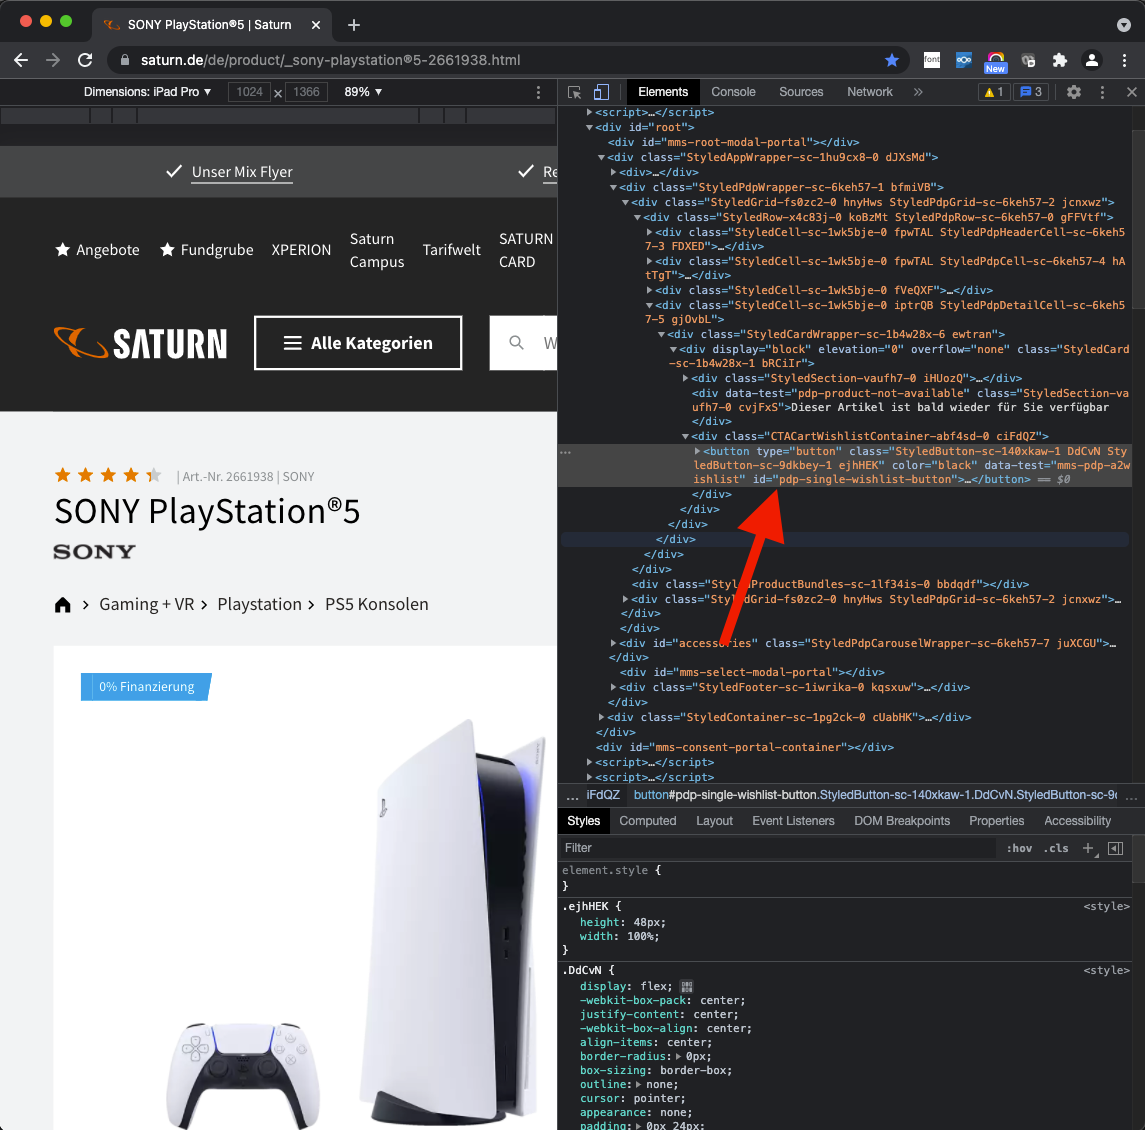
An element on a page can easily be addressed via its ID, e.g.
element = driver.find_element_by_id("mms-login-form__email")
What if an element has no ID? Then we can select the element via its XPath. In the code this is done in the function for clicking a button:
element = driver.find_element(By.XPATH, f'//button[text()="{button_text}"]')
With the code element.click() the button gets “clicked”, but sometimes this does not work because of how the developers used JavaScript for their buttons.
Therefore I added a different method for clicking a button:
driver.execute_script("arguments[0].click();", element)
Finally, the action for filling in a form element, e.g. the one for the email address:
driver.find_element_by_id("mms-login-form__email").send_keys(username)
There might be one last question: how do we know the IDs of those elements?
Open Chrome on the page with the element you want to identify, right-click and click “Inspect”. Then check the “id” field of this element.
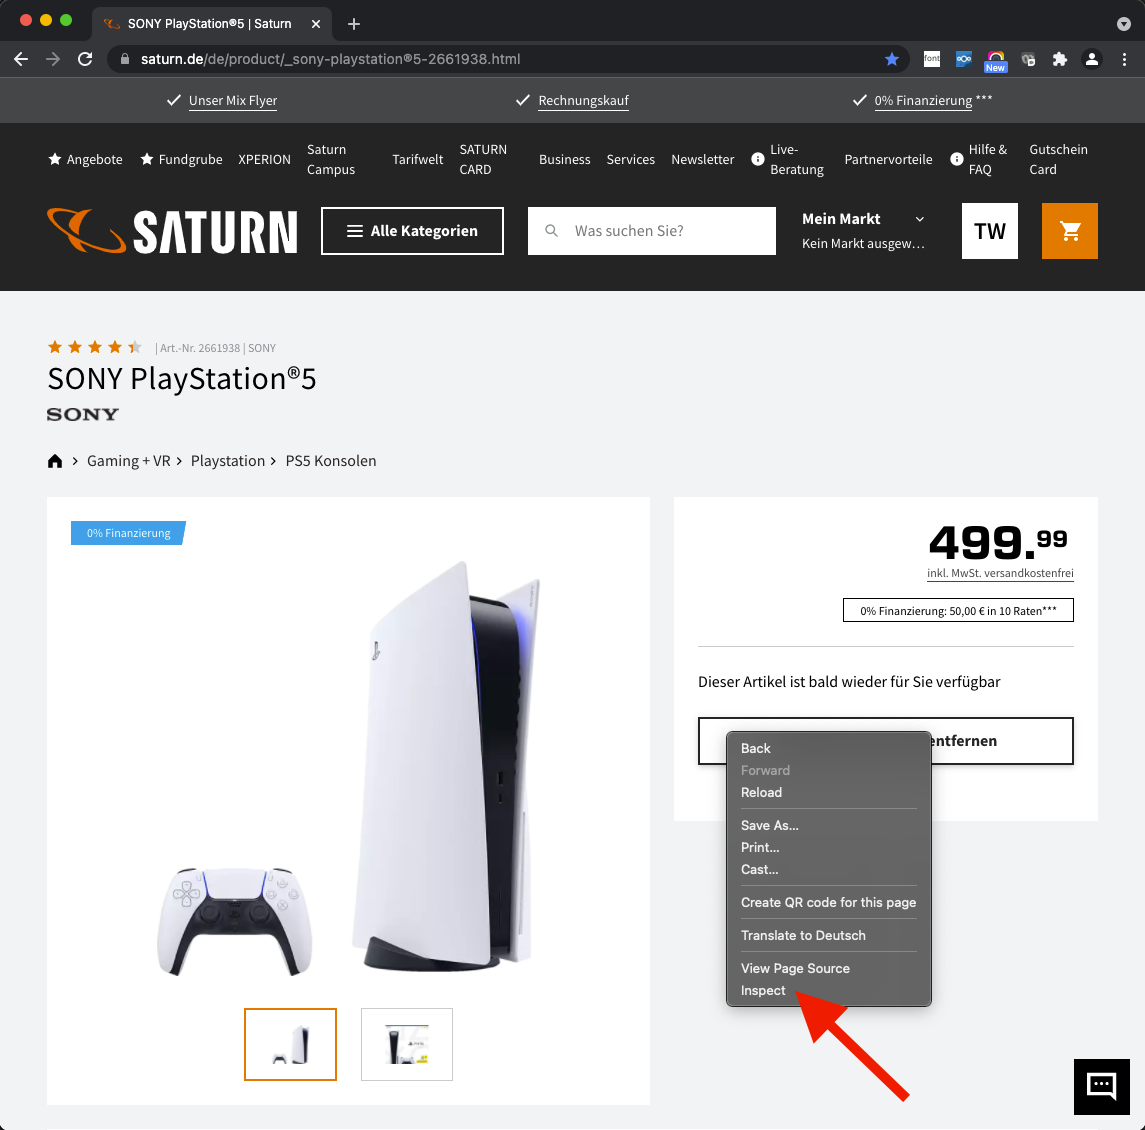
A side-bar opens showing the source with the selected element.
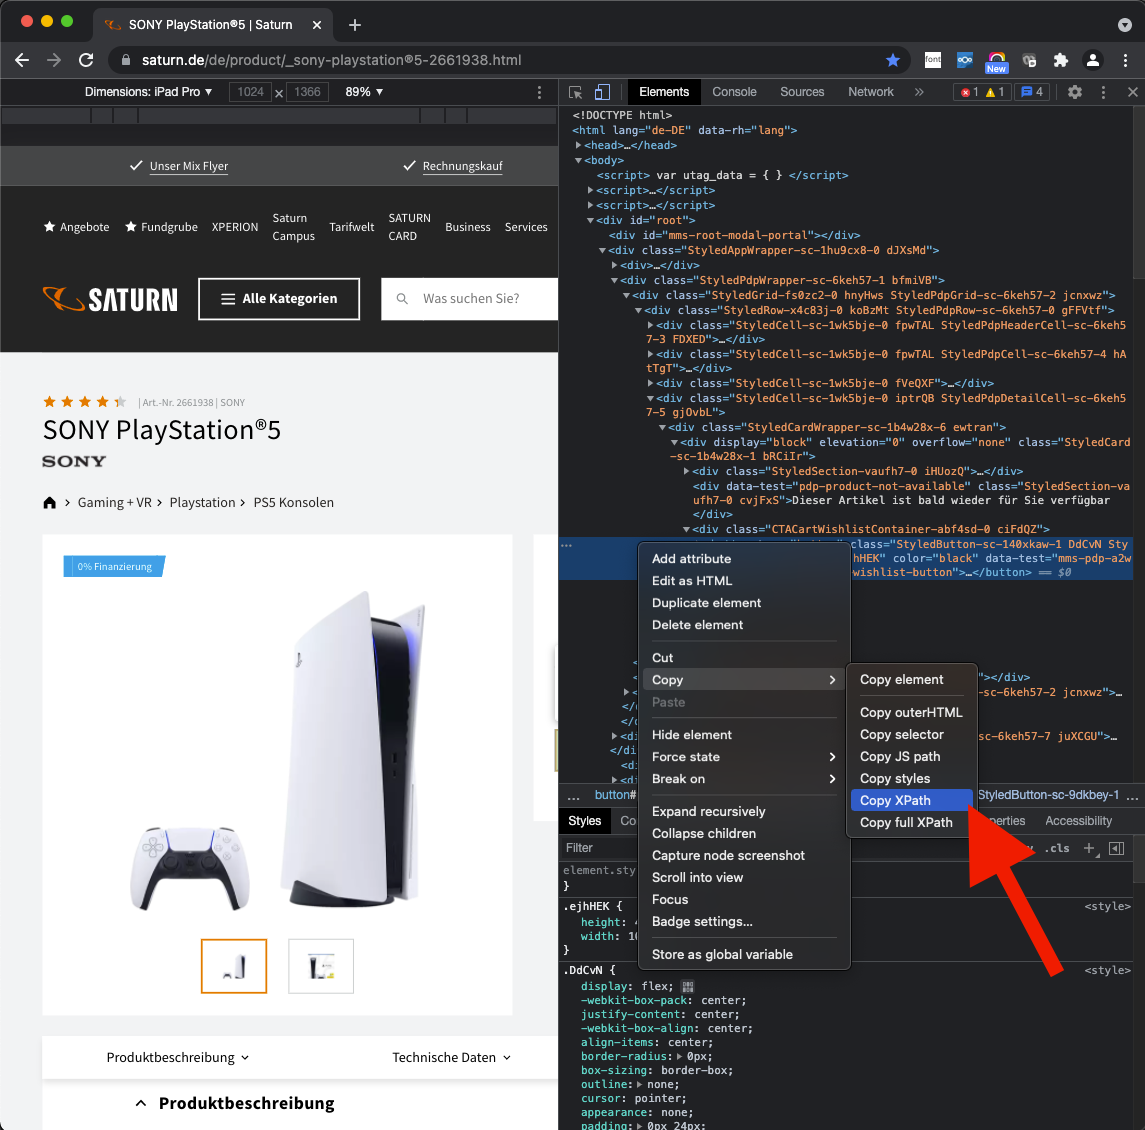
What if there is no id attribute? Right-click again and select “Copy → XPath”.
Conclusion
I hope this tutorial has given you some insight into how to automate browser tasks for various purposes. Sorry for luring you into the field of web-frontend testing with a “clickbaity” title. There is really not much to the code and it is easy to understand, right?
Anyway, I hope you enjoyed this tutorial!
Feel free to buy me a coffee if you liked this post.
Done for today!