This tutorial provides a general approach to extracting data from Bluetooth Low Energy (BLE) devices, using a heart-rate and blood-oxygenation monitor as an example.
For this tutorial I am using:
- Medisana PM100 Connect
- iPhone 11 Pro Max
- iOS 14.4
- MacBook Pro, 13-inch, 2016
- macOS Big Sur 11.2.2
- XCode 12.4

Introduction
For a long time I searched for an affordable blood oximeter that can connect to a smartphone via Bluetooth.
Finally I was lucky and found the “PM100 Connect” by Medisana.
The company claims it has an app called “VitaDock” that captures and displays data from the device.
To make a long story short, I was not able to get the device to work with this app. While reading reviews on Amazon I discovered I was not the only one having problems.
I was fed up and close to returning it when I realized this was an excellent opportunity to learn Apple’s “Core Bluetooth” framework and how Bluetooth Low Energy devices work.
It was time to dive into coding and get my hands dirty— or raise my heart rate, which, by the end of this tutorial, can be measured with the code that follows!
Prerequisites
In order to allow the device to use Bluetooth, two keys need to be set in the Info.plist.
Privacy - Bluetooth Always Usage DescriptionPrivacy - Bluetooth Peripheral Usage Description

CentralManagers and Peripherals
The entry point of this tutorial is the CBCentralManager, which is “an object that scans for, discovers, connects to, and manages peripherals.”
Let’s create one and wire it up.
var centralManager: CBCentralManager?
centralManager = CBCentralManager(delegate: self, queue: nil)
Upon instantiation, an object that will act as a delegate must be provided.
This delegate must implement centralManagerDidUpdateState(_ central: CBCentralManager) so the app can check whether the device running the app actually supports Bluetooth.
func centralManagerDidUpdateState(_ central: CBCentralManager) {
	guard central.state ==.poweredOn else {
		logger.debug("No Bluetooth available")
  return
	}
	central.scanForPeripherals(withServices: nil, options: nil)
}
When Bluetooth is available, the app will scan for peripherals in its vicinity.
Another delegate method needs to be implemented to determine which peripherals are available.
func centralManager(_ central: CBCentralManager, didDiscover peripheral: CBPeripheral, advertisementData: [String: Any], rssi RSSI: NSNumber) {
	logger.debug("Found peripheral: \(peripheral.description)")
}
With the PM100 turned on, I quickly discovered its name is “e-Oximeter.”
Let’s connect to it.
centralManager?.connect(peripheral, options: nil)When the connection has been established, this delegate method will be called.
func centralManager(_ central: CBCentralManager, didConnect peripheral: CBPeripheral) {
	logger.debug("Connected to peripheral: \(peripheral.description)")
}
Done! You have successfully connected to the PM100 (or any other device used in this tutorial). Next, we’ll walk through how to discover all the data the device can send.
Services and Characteristics
To see what the Bluetooth peripheral offers, first discover its services:
peripheral.discoverServices(nil)In the documentation, see CBService. A service is described as “A collection of data and associated behaviours that accomplish a function or feature of a device.”
Implement the appropriate CBPeripheralDelegate method that is called when a service is discovered.
func peripheral(_ peripheral: CBPeripheral, didDiscoverServices error: Error?) {
	peripheral.services?.forEach { service in
		logger.debug("Discovered service: \(service.description)")
	}
}
The PM100 has four services:
Discovered service: <CBService: 0x2816b8700, isPrimary = YES, UUID = Device Information>
Discovered service: <CBService: 0x2816b82c0, isPrimary = YES, UUID = Battery>
Discovered service: <CBService: 0x2816b84c0, isPrimary = YES, UUID = 1822>
Discovered service: <CBService: 0x2816b8300, isPrimary = YES, UUID = 0000FEE8-0000-1000-8000-00805F9B34FB>
For every service we can discover the so-called characteristics:
peripheral.discoverCharacteristics(nil, for: service)We ‘re very close to retrieving the heart rate and oxygenation data with CBCharacteristic. Refer to the documentation:
“CBCharacteristic and its subclass CBMutableCharacteristic represent further information about a peripheral’s service. In particular, CBCharacteristic objects represent the characteristics of a remote peripheral’s service. A characteristic contains a single value and any number of descriptors describing that value. The properties of a characteristic determine how you can use a characteristic’s value, and how you access the descriptors.”
We need to implement a delegate method to retrieve all discovered characteristics:
func peripheral(_ peripheral: CBPeripheral, didDiscoverCharacteristicsFor service: CBService, error: Error?) {
	service.characteristics?.forEach { characteristic in
		logger.debug("Discovered characteristic: \(characteristic.description) for service \(service.uuid)")
	 }
}
A bit of digging in the Bluetooth specification shows we want the value of characteristic 2A5F of service 1822. You can also Google that.
We want to be notified when the device sends out the heart rate and oxygenation data. Therefore we need to call the following:
if (characteristic.uuid CBUUID(string: "2A5F")) {
	peripheral.setNotifyValue(true, for: characteristic)
}
Finally, retrieve the values by implementing the remaining delegate method:
func peripheral(_ peripheral: CBPeripheral, didUpdateValueFor characteristic: CBCharacteristic, error: Error?) {
guard characteristic.service.uuid CBUUID(string: "1822"),
characteristic.uuid == CBUUID(string: "2A5F"),
let data = characteristic.value else {
return
}
let numberOfBytes = data.count
var byteArray = [UInt8](repeating: 0, count: numberOfBytes)
(data as NSData).getBytes(&byteArray, length: numberOfBytes)
logger.debug("Data: \(byteArray)")
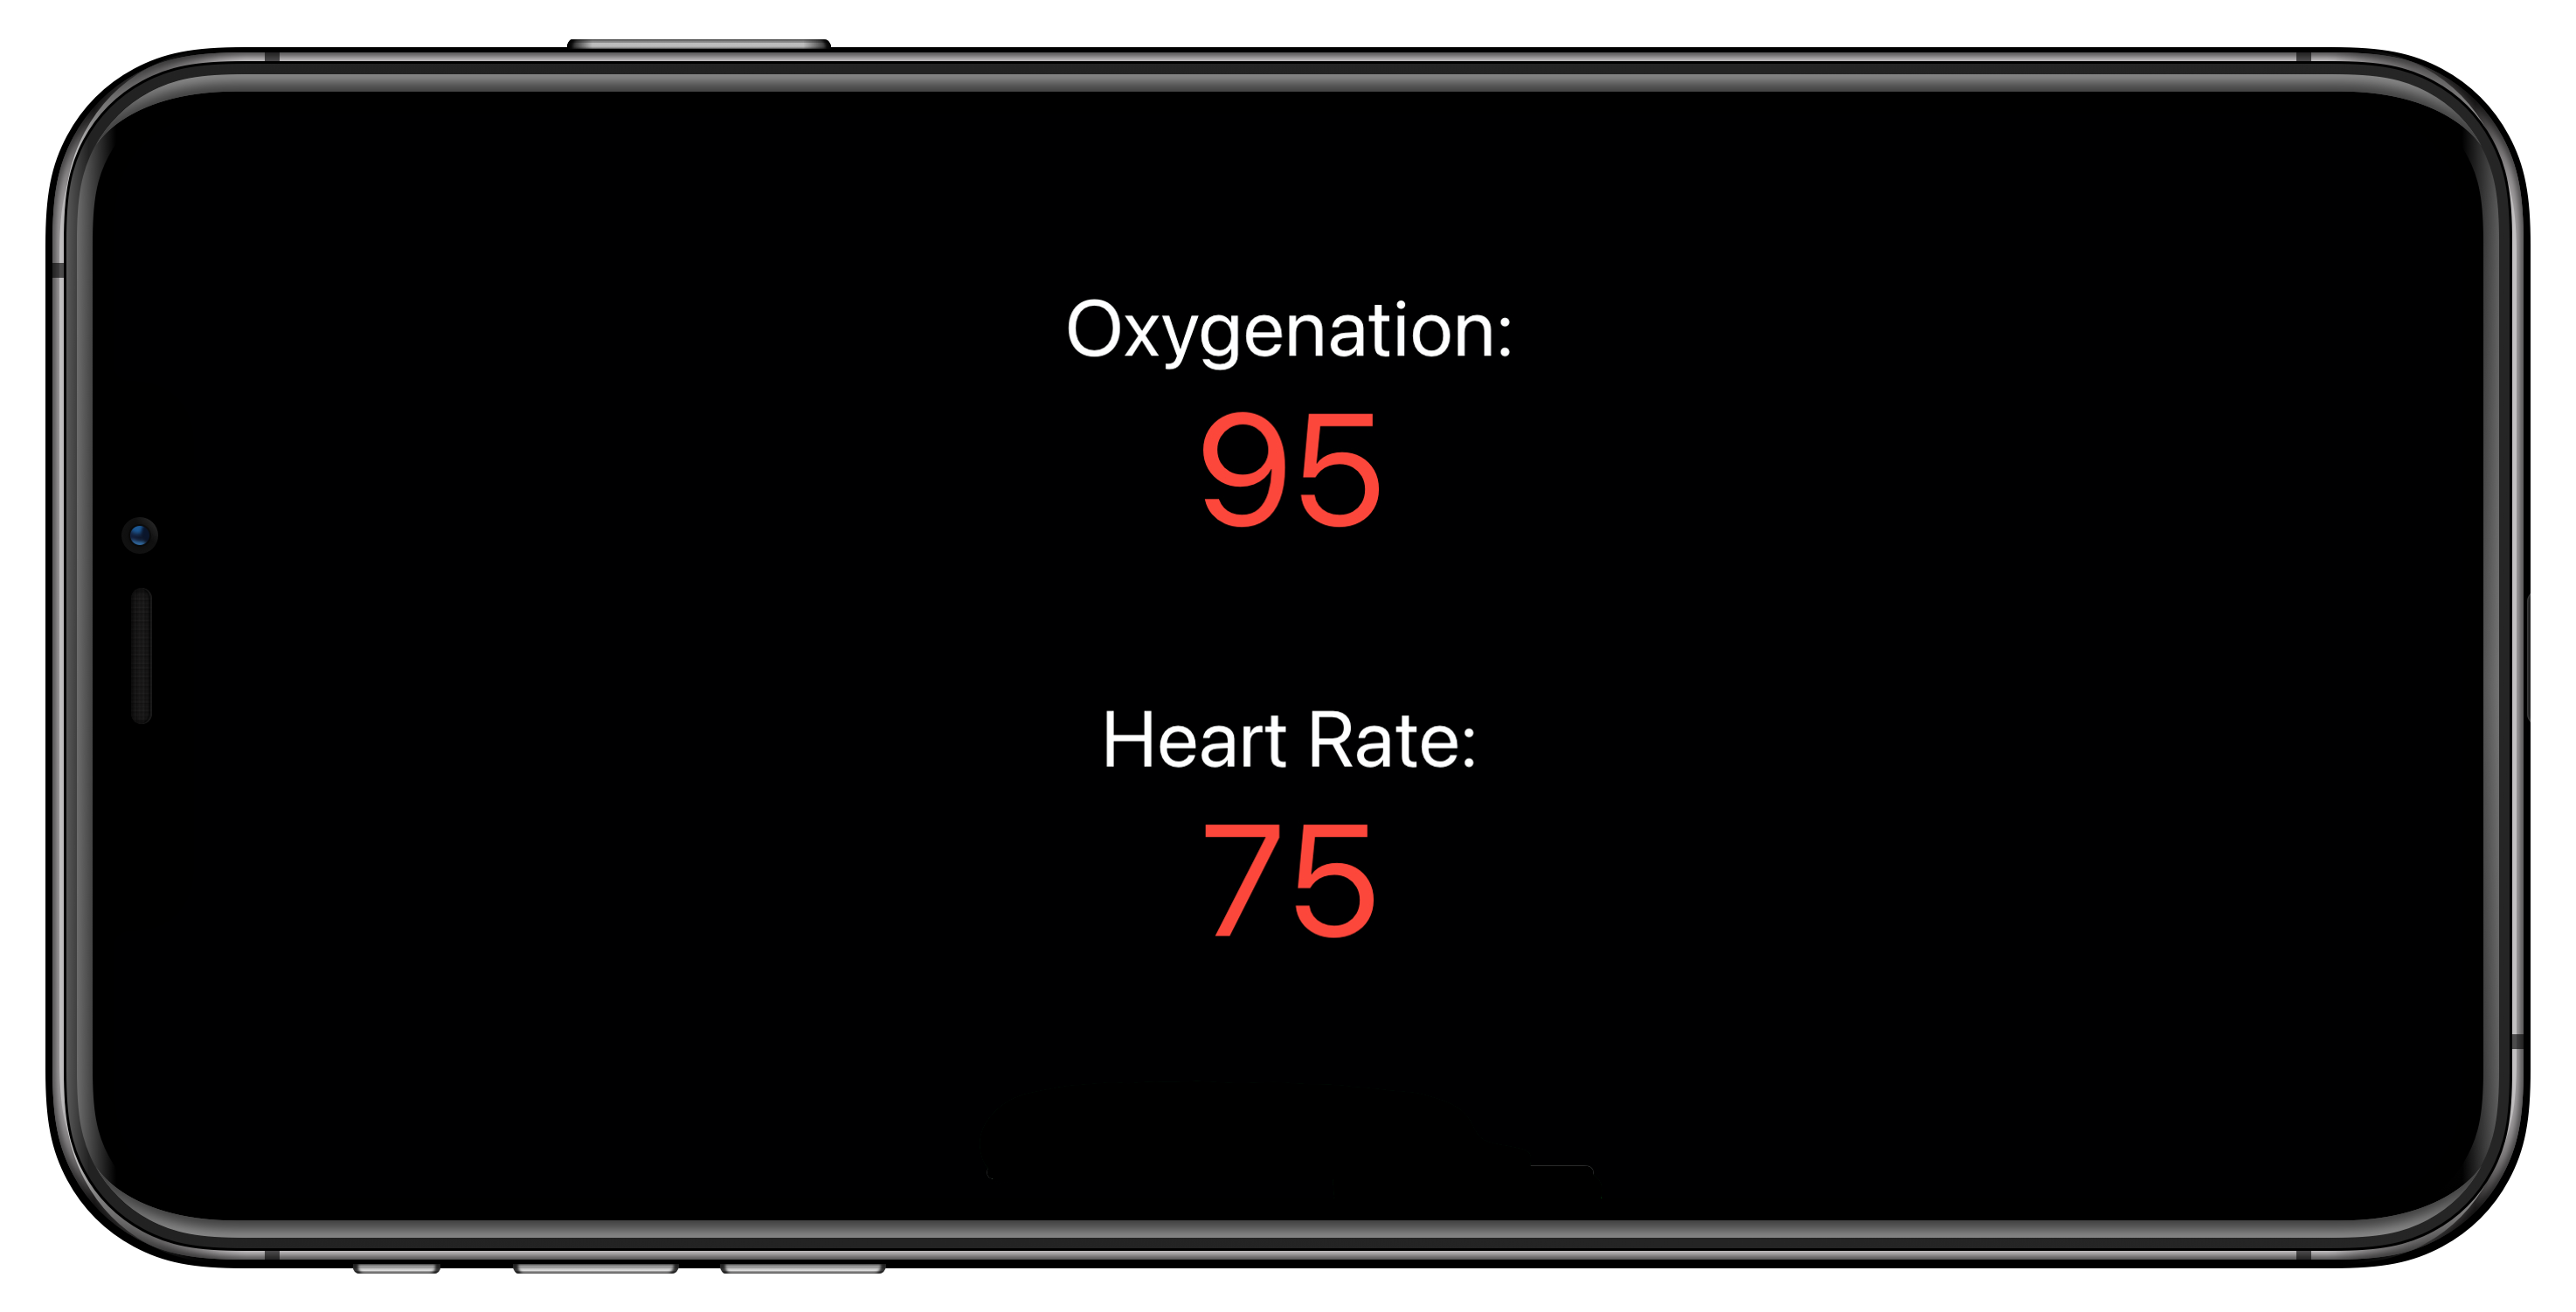
}By comparing the values of the byteArray with the display of my PM100, it was easy to determine which value corresponds to heart rate and which to oxygenation:
let oxygenation = byteArray[1]
let heartRate = byteArray[3]
We ‘re done! So, no matter what Bluetooth device you ‘re interested in, the approach should be the same for discovering its services and characteristics.
Actually, we are not quite done yet…
Example Application
If you need a fully working SwiftUI application that displays the heart rate and oxygenation data shown in this tutorial, I provide the complete Xcode workspace to download.
Thanks for reading, and thank you for your support!