Time to check out some new little hardware that came straight from China.
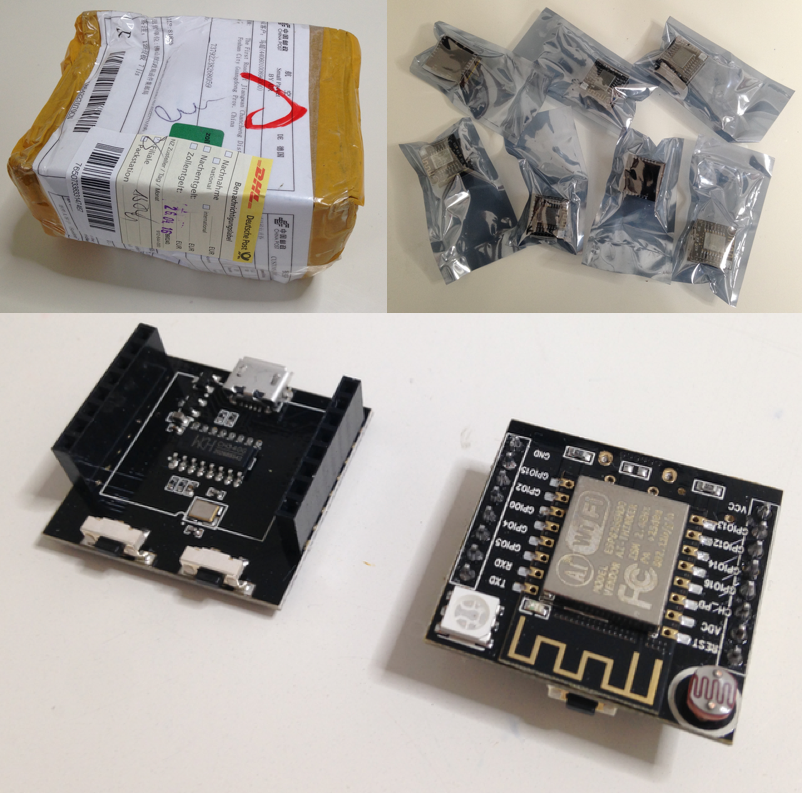
Although there are lots of articles and forum posts about these little boards, it took me some time to figure them out and get my “Hello World!” kind of thing running.
Since I ‘m familiar with the Arduino IDE, I decided to use it to flash the ESPs.
All in all, these are the steps I spent my weekend on:
- Download and install the Arduino IDE.
- Download and install the ESP8266 core for the Arduino IDE.
- Mac users only: download and install the serial driver that is necessary to connect the development board via USB.
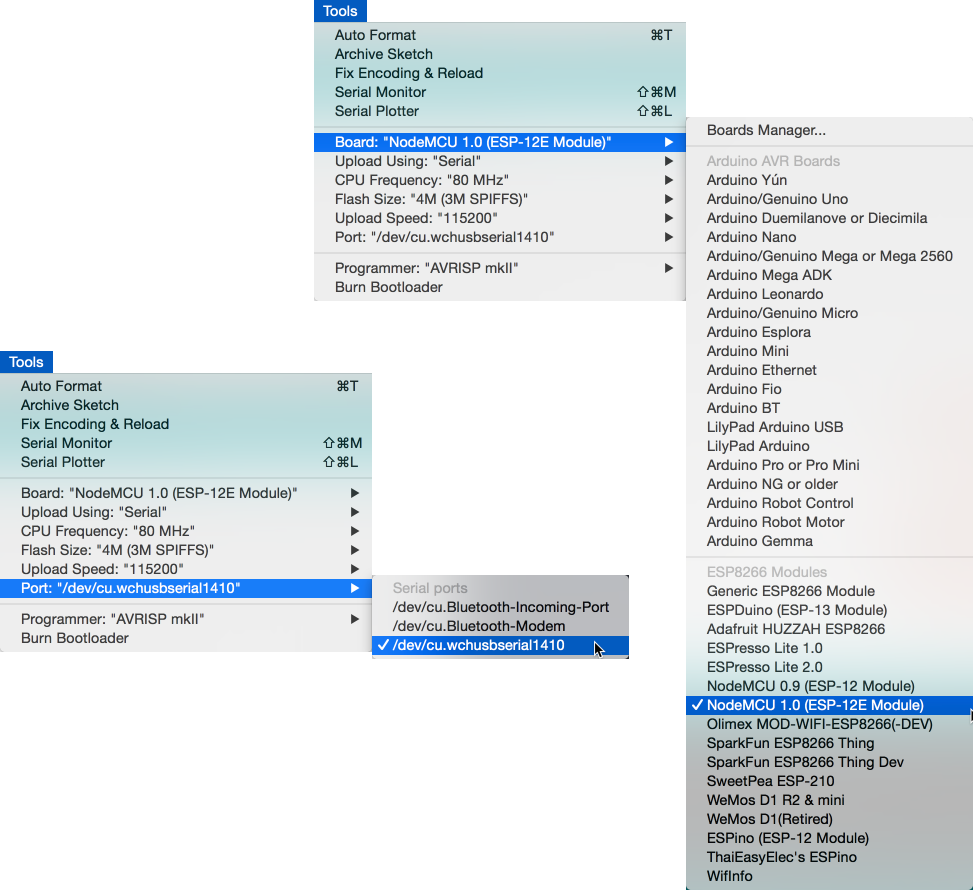
- In the Arduino IDE, select the board “NodeMCU 1.0 (ESP-12E Module)“.
- In the Arduino IDE, select the port “/dev/cu.wchusbserial1410”.
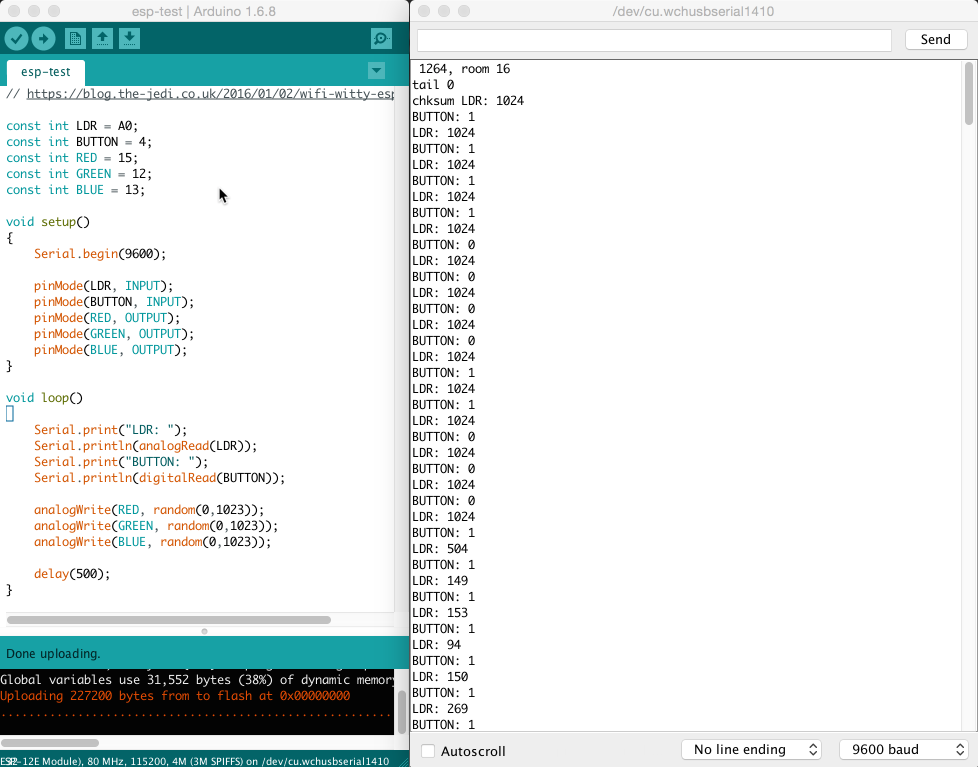
- Create your first sketch and upload it to your ESP. I used the sketch from this blog post.
{% gist 39535250d1e252f74bfdcd0cff81808a esp8266-hello-world.ino %}
- Run the sketch and open the serial monitor. The LED colors should change every half-second. To check if the inputs are working, press the button and place your hand around the LDR.
Done for today!