The nice thing about a Raspberry Pi is how easy it is to control real hardware with it.
Kids these days have it so easy to tinker with electronics— I wish it had been that easy in my time. Twenty years ago, when I was fiddling with resistors and capacitors, there were no Arduinos, Raspberry Pis, or all those wonderful toys.
In this and this post I made a Docker host out of a Raspberry Pi. It ran one container hosting a single web page.
The next step was to “talk” to the input and output pins and make a blinking LED “application” as a kind of “Hello World” example.
There ‘s already an image we can use for this. It includes a tool called wiringPI that we ‘ll use to turn an LED on and off.
I followed four steps:
- Create the docker-compose.yml file describing my “services”.
- Write a shell script that calls wiringPI to make the LED blink.
- Configure the Raspberry Pi to start everything after boot.
- Wire the hardware.
The docker-compose file looks like this:
{% gist 20ed411159fc04999c06 docker-compose.yml %}
To set the port output mode and make the LED blink, I created this shell script:
{% gist 20ed411159fc04999c06 blink.sh %}
Everything is on GitHub. While logged into Hypriot, you only need to:
git clone https://github.com/twissmueller/docker-pi.git
cd docker-pi
git checkout tags/2015-12-01
For step three, add the following line to /etc/rc.local:
docker-compose -f /root/docker-pi/docker-compose.yml up -d
Assuming all files are in /root/docker-pi.
Now it’s time to wire it up. There is a wonderful tool called Fritzing for designing, illustrating, and sharing Raspberry (and other) projects.
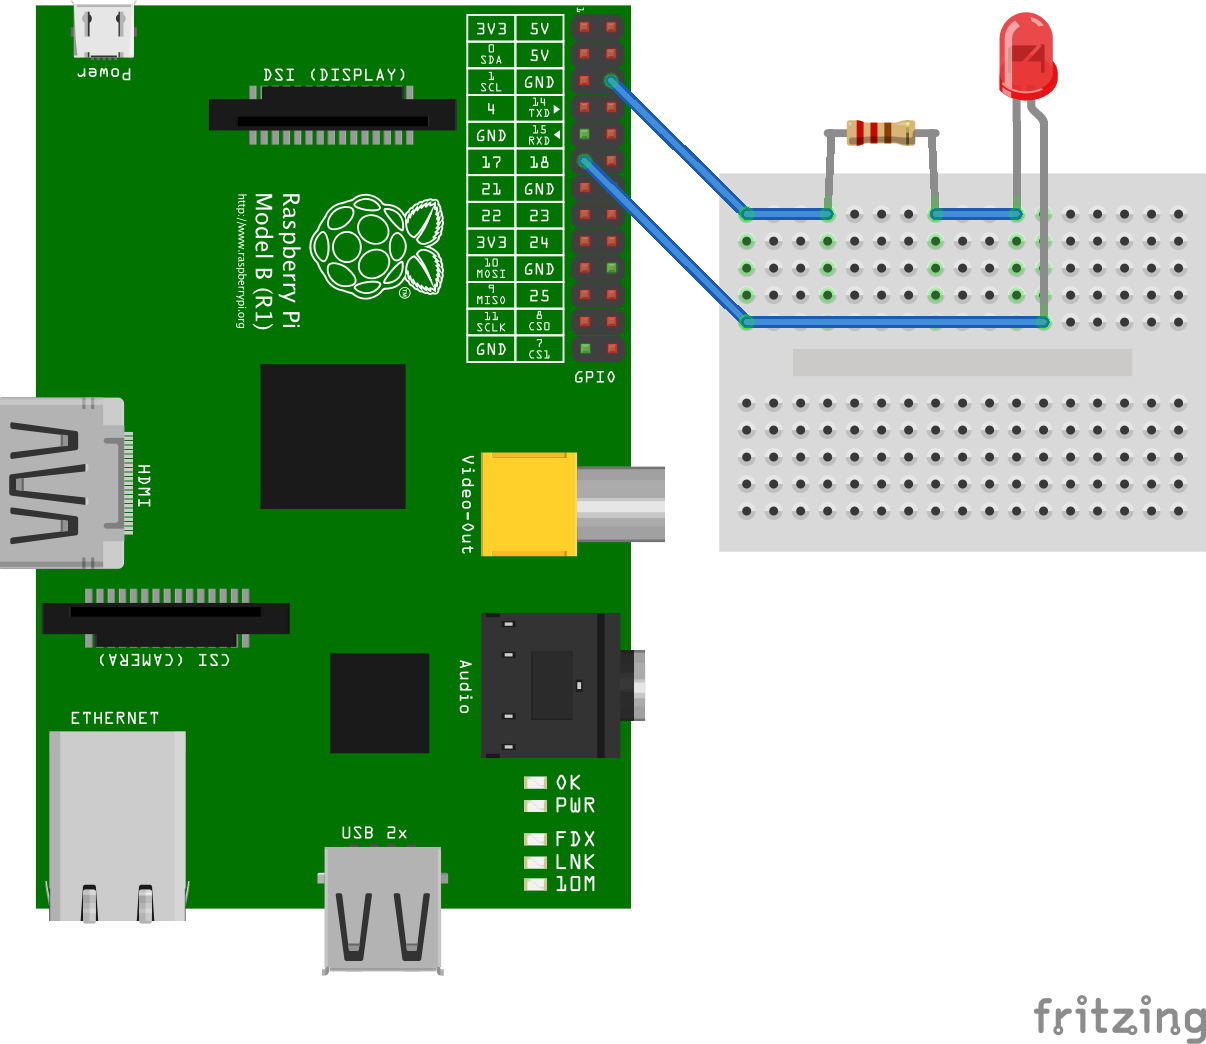
You can download the Fritzing project from this link.
Done for today!