Let’s take the last two posts about Jekyll and Docker and create a Docker image as a basis for containers serving a Jekyll blog.
Whenever the image is built and the container is run, the following will happen:
- Code for running git and Jekyll will be installed.
- A Git repo containing the Jekyll blog will be cloned.
- Jekyll will be run, building and serving the static site.
The Dockerfile looks like this:
{% gist 41c14bedd5fc05cc2ab8 Dockerfile.jekyll_serve %}
It is built with
docker build --tag="your_tag/jekyll_serve" --rm=true.
After that it’s run with
docker run -d -p 4000:4000 --name jekyll_serve your_tag/jekyll_serve:latest
In this case, port 4000 of the Docker container is mapped to port 4000 on the Docker host.
To test whether the blog is being served on that port, run curl on the Docker host to localhost:4000. You should retrieve the index of the newly created blog.
If you work with a Vagrant box as your Docker host, you can add the following line to your Vagrantfile to enable port forwarding for Jekyll to your physical host:
config.vm.network "forwarded_port", guest: 4000, host: 4000
Now, when I open my browser on my Mac and type localhost:4000, I will be forwarded into my Vagrant box on port 4000, which will forward me to the container’s port 4000.
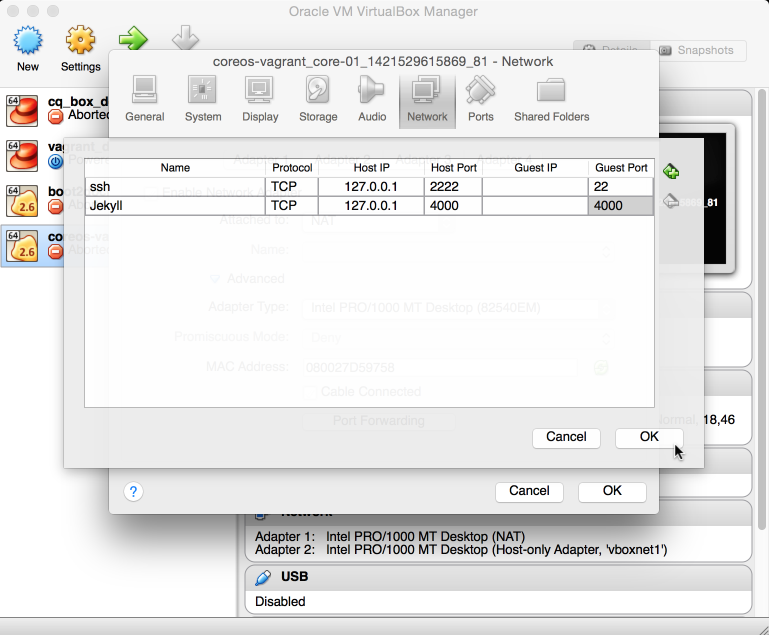
Another option is to manually add the port forwarding from the physical host to the Vagrant box under VirtualBox in Settings → Network → Advanced → Port Forwarding.
In this post you learned how to create a Docker image that builds and serves a Jekyll blog. If it’s your first Dockerfile, congratulations— it won’t get much more complicated when creating Dockerfiles; you ‘ve covered the most important steps already.
Done for today!