(Note: This was the first post of another blog I had. Since I decided to only maintain this blog I migrated those old posts without substantially changing this text.)
Around the same time last year, I made myself a birthday present:
- I got myself two developer licenses from Apple, one for iOS and one for OS X.
- Got an app icon designed over at 99designs.
The final happy birthday present resulted in the release of MIDI Aid for Mac and MIDI Aid for iPhone, iPad and iPod touch.

 Get MIDI Aid for iPad, iPhone and iPod touch
This year’s birthday present is related to MIDI Aid. I want to give back and share the knowledge I gained writing MIDI Aid by starting a new blog in addition to my first blog “Ramp me up, Scotty!“. This blog is all about Core MIDI and a bit of Core Audio programming.
Although MIDI Aid was written in Objective-C, I try to provide most examples in the Swift programming language in this blog for my own learning experience.
Once a nerd, always a nerd! Um, okay. I have never been a nerd, but I like to learn new programming languages.
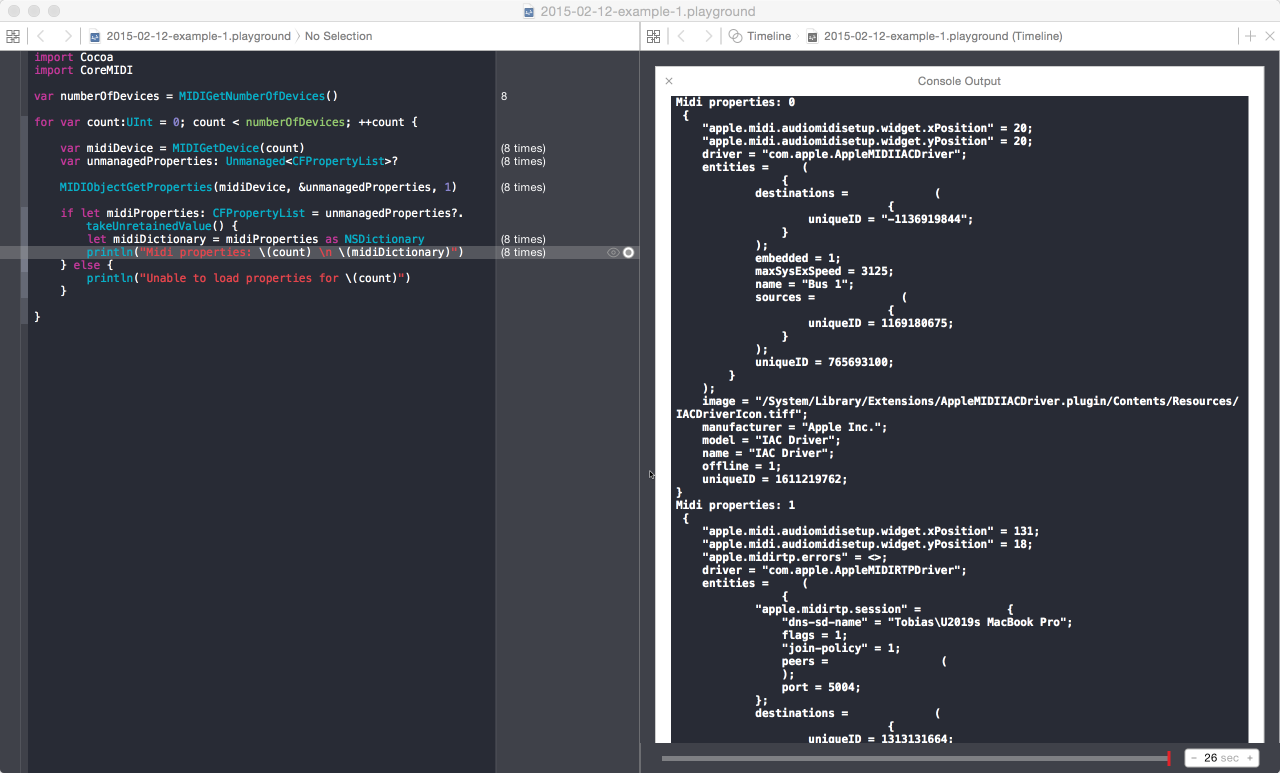
Let’s get the ball rolling: start Xcode and write your first Core MIDI code. I’m also trying to do most examples in Xcode playgrounds. They are kind of nice to use and share. When Xcode’s start screen comes up, just select “Get started with a playground”.

Now add the snippet below into the editor and run it. The code will query your system for any registered MIDI devices and display their properties.
{% gist 5012d94ad6194d426048 %}
Did it work? Great! Congratulations on your first working Core MIDI code.
You should be able to see something like this after expanding the output of the last line by clicking the little plus symbol.
Now you are all set for more. Watch this space in the future and follow me on twitter for updates.
Done for today!