In my last post I performed all the steps necessary for installing and configuring RabbitMQ on CentOS 6.2. I did that the old-fashioned way by using the command line and typing everything step by step.
When installing RabbitMQ on a new box, I would have to do it all over again.
Great times we are living in! There are mechanisms that fully automate those steps. I have already written about Puppet in another blog post, and today we are going to use that knowledge to create a Puppet configuration for RabbitMQ. So, let’s start.
I have also created a project where I will keep all the configuration from now on. Get it with
git clone git@github.com:tobias-wissmueller/dev_ops_central.git
cd dev_ops_central
Let’s add your box first if you don’t have it anymore.
vagrant box add dev_ops_central_box <path_to_your_box>/package.box
Set permissions on the SSH key and fire up the box.
chmod 0600 id_rsa.vagrant
vagrant up
vagrant ssh
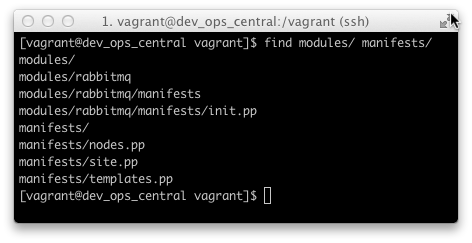
In your box create the following directory and file structure in the directory /vagrant.
I am not going to list the contents of all files but instead redirect you to my repository for this project on GitHub where you can get the complete setup. If you already cloned my repository, you should have everything on your local machine. Since I will continue working on that branch and you want to get the same version I have committed after this post, note that I tagged the commit with the label ‘managing_rabbitmq_with_puppet’.
Now go into /etc/puppet as root and remove the manifests directory
sudo bash
cd /etc/puppet
rm -rf manifests/
Now create some symbolic links to your Puppet configuration.
ln -s /vagrant/manifests
ln -s /vagrant/modules
Again we are dealing with a brownfield here. Removing that directory and creating those symbolic links should have been done before packaging up the box, but we could also do that with Puppet, of course.
Let us continue with adding everything to our configuration we need for RabbitMQ. This time my thanks go to Rob Harrop from First Banco, who wrote an excellent post titled “Automating Development VMs with Vagrant and Puppet”. Yes, that’s the same approach I am taking here, but I need to do it on my own and write about it to gain a deeper understanding.
I took the whole configuration and changed a few version numbers here and there. After that, I triggered the provisioning process with
puppet apply --verbose manifests/site.pp
Additionally I stopped the firewall with
/etc/init.d/iptables stop
I have included that in my Puppet configuration as well, so if you are using my code there is no need to run the above command.
Like in my last post, I have checked the whole setup by pointing the browser from my host system to the RabbitMQ Management Center on my Vagrant box using the following URL: http://localhost:55672 and logging in with username guest and password guest.
What I am not going to do here is the SSL configuration. I will leave that for another time since I have no immediate use for it.
We are one step further now in automating our infrastructure. If we mess something up, we can destroy and rebuild our box and everything will be fine again. Try it out and exit your box, then run the following
vagrant destroy && vagrant up
That will take a while. In the meantime, go make a coffee, and when you return a fresh box will be waiting for you.
Done for today!